Your guide to the SpatialChat dashboard
A successful online gathering starts before anyone enters the room and continues after the last person leaves. The SpatialChat dashboard helps you manage that work: organizing spaces, inviting people, reviewing activity, and finding recordings from previous sessions.
This guide walks you through the main dashboard sections and explains how to use them when preparing a workshop, running a virtual office, or hosting an event.
Start with your team and spaces
The team selector at the bottom of the sidebar shows which team you are working with. Check it before managing spaces, reviewing members, or changing settings—particularly if you belong to several teams.
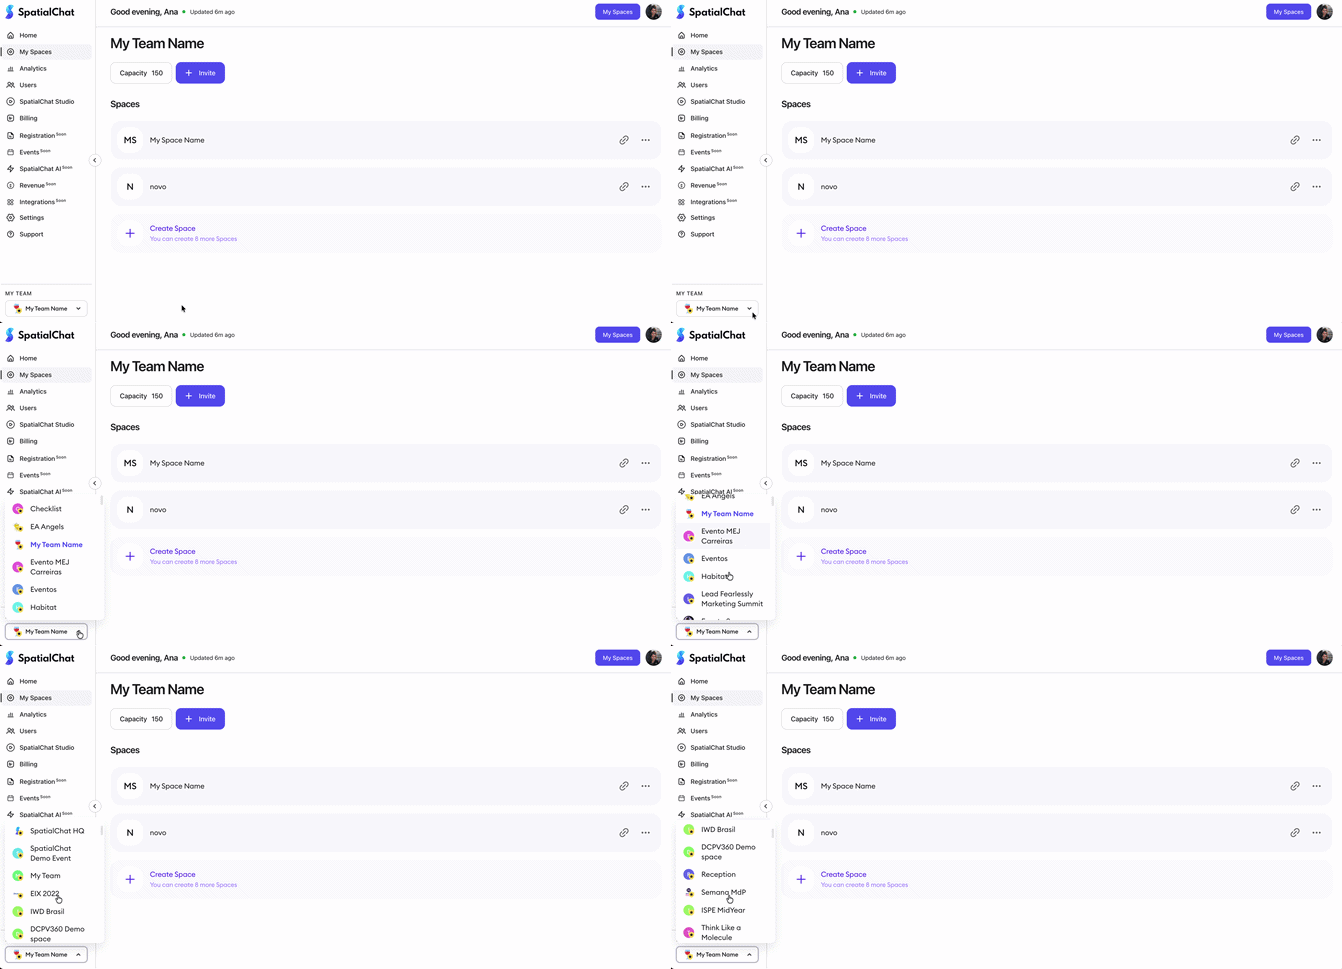
Open My Spaces to see the spaces associated with that team. The page brings together your space list, capacity information, and the Invite and Create Space controls. It also shows how many additional spaces you can create within your allowance.
For example, you might use separate spaces for a recurring team gathering and a workshop series. Keeping them under the same team gives you a common place to manage them.
Choose a starting point for a new space
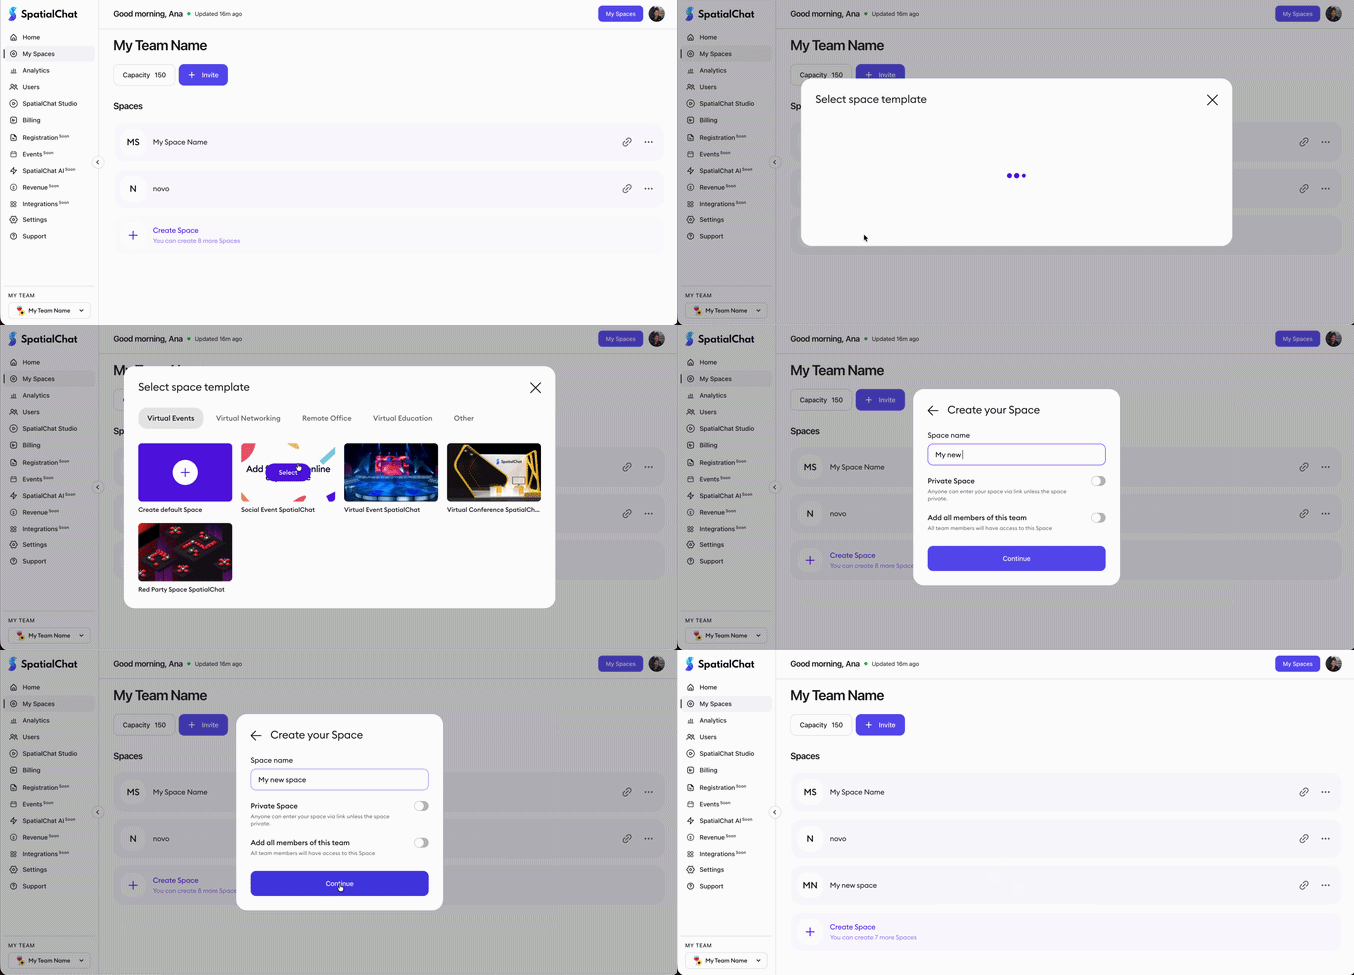
Selecting Create Space opens the template chooser. Categories include Virtual Events, Virtual Networking, Remote Office, Virtual Education, and Other.
Browse the category that matches your activity, then choose a template as your starting point. The chooser also offers Create default Space.
For a networking event, start by exploring the networking templates. For an ongoing workplace, look at the remote-office options. This helps you begin with a layout suited to the type of gathering you are planning.
Invite people
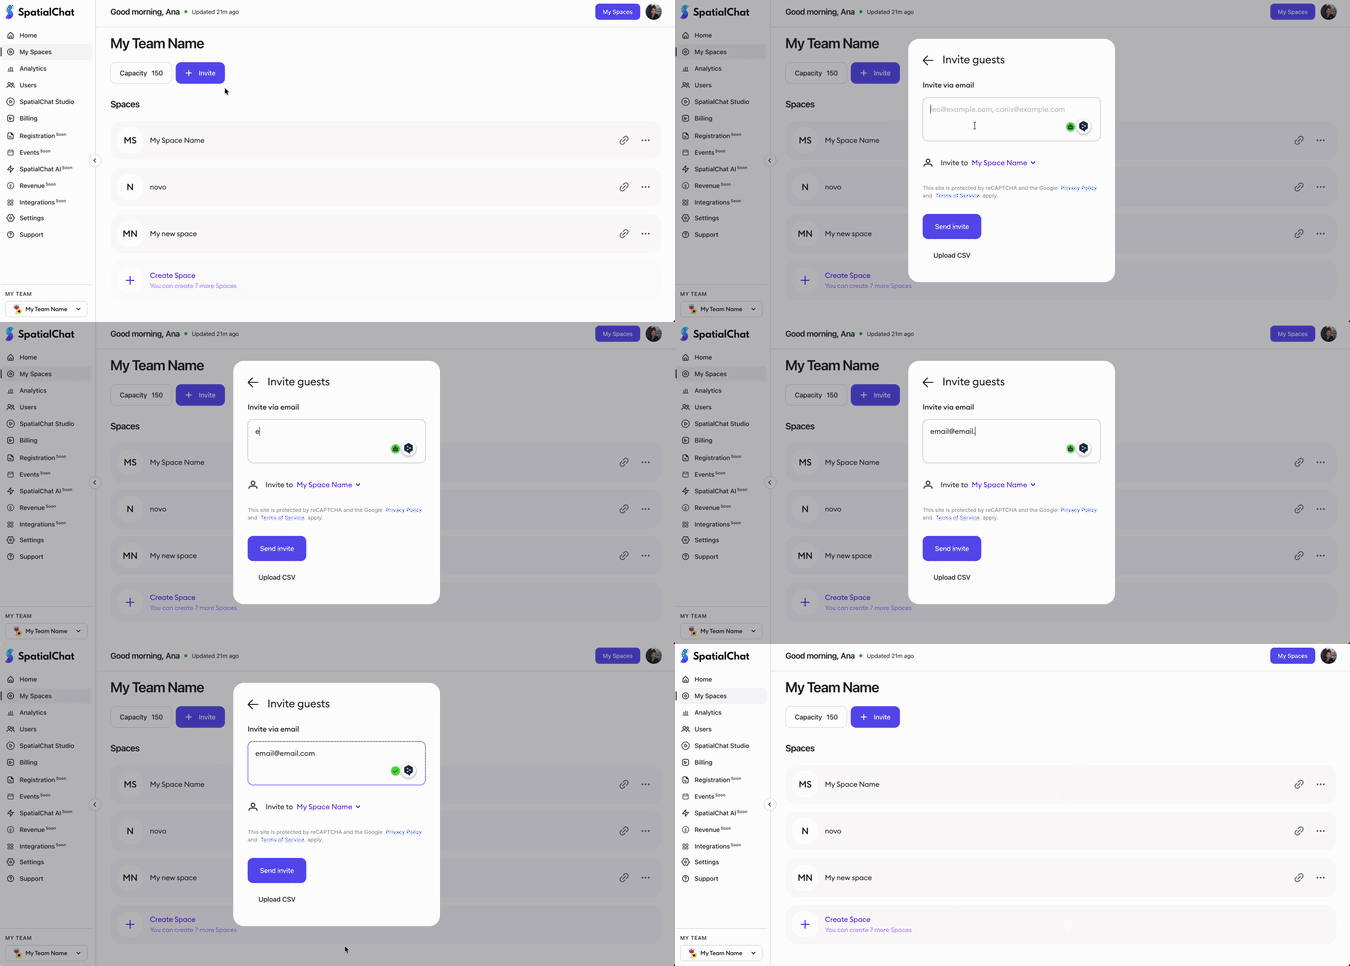
The Invite menu distinguishes between Team members and Guests. Choose the invitation flow that matches the person’s relationship with your team.
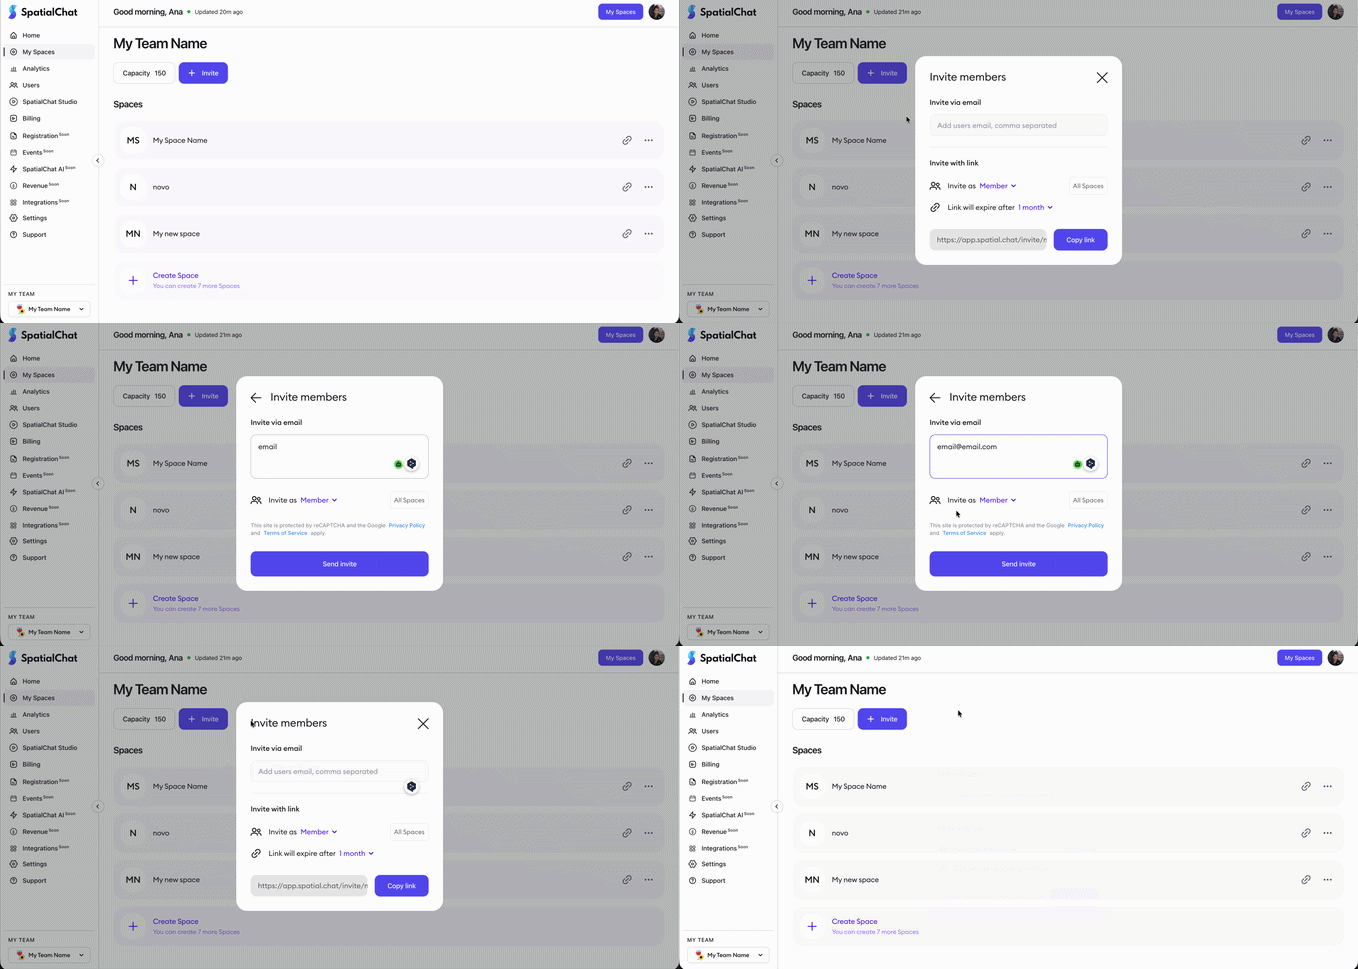
The guest invitation panel offers two methods:
- Invite via email: enter email addresses, separated by commas.
- Invite with link: choose the destination space, review the link’s expiration setting, and copy the invitation link.
Before distributing a guest invitation, check the Invite to field. This is especially useful when your team manages multiple spaces: a workshop guest should receive an invitation to the workshop space.
Also review Link will expire after, so the invitation remains usable for the period you intend.
Manage members and guests in Users
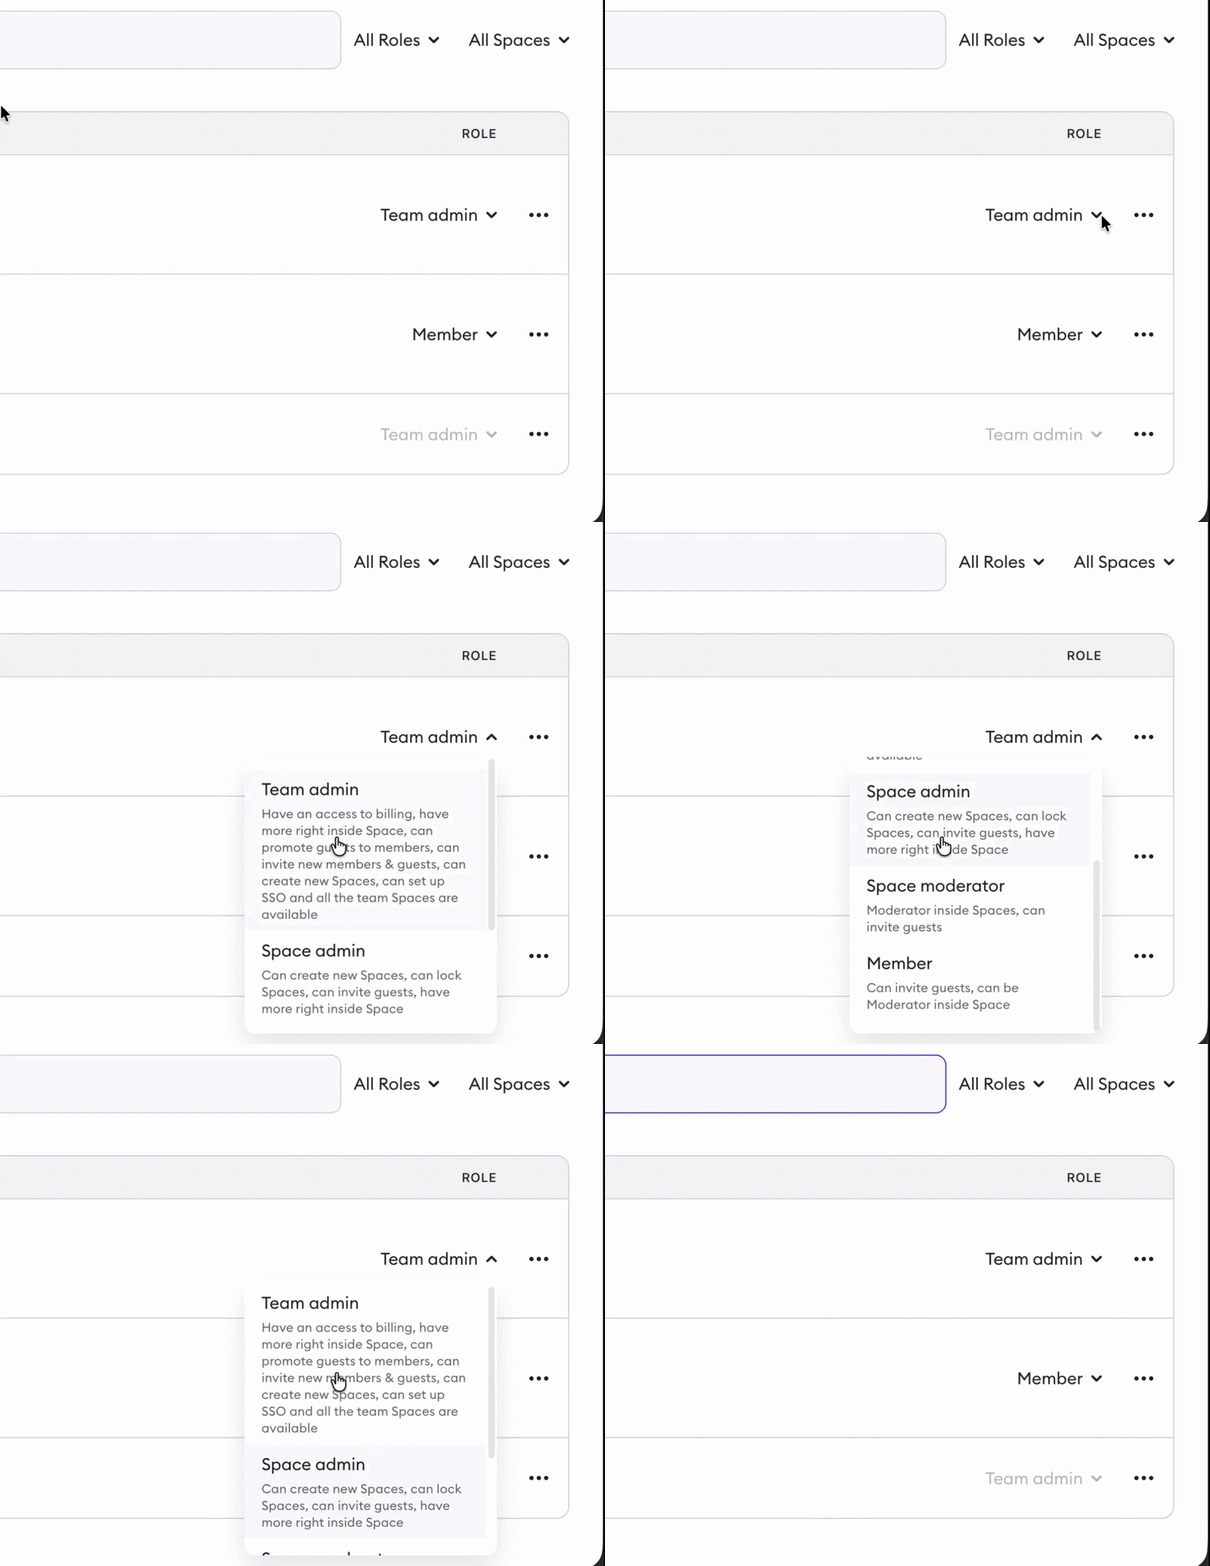
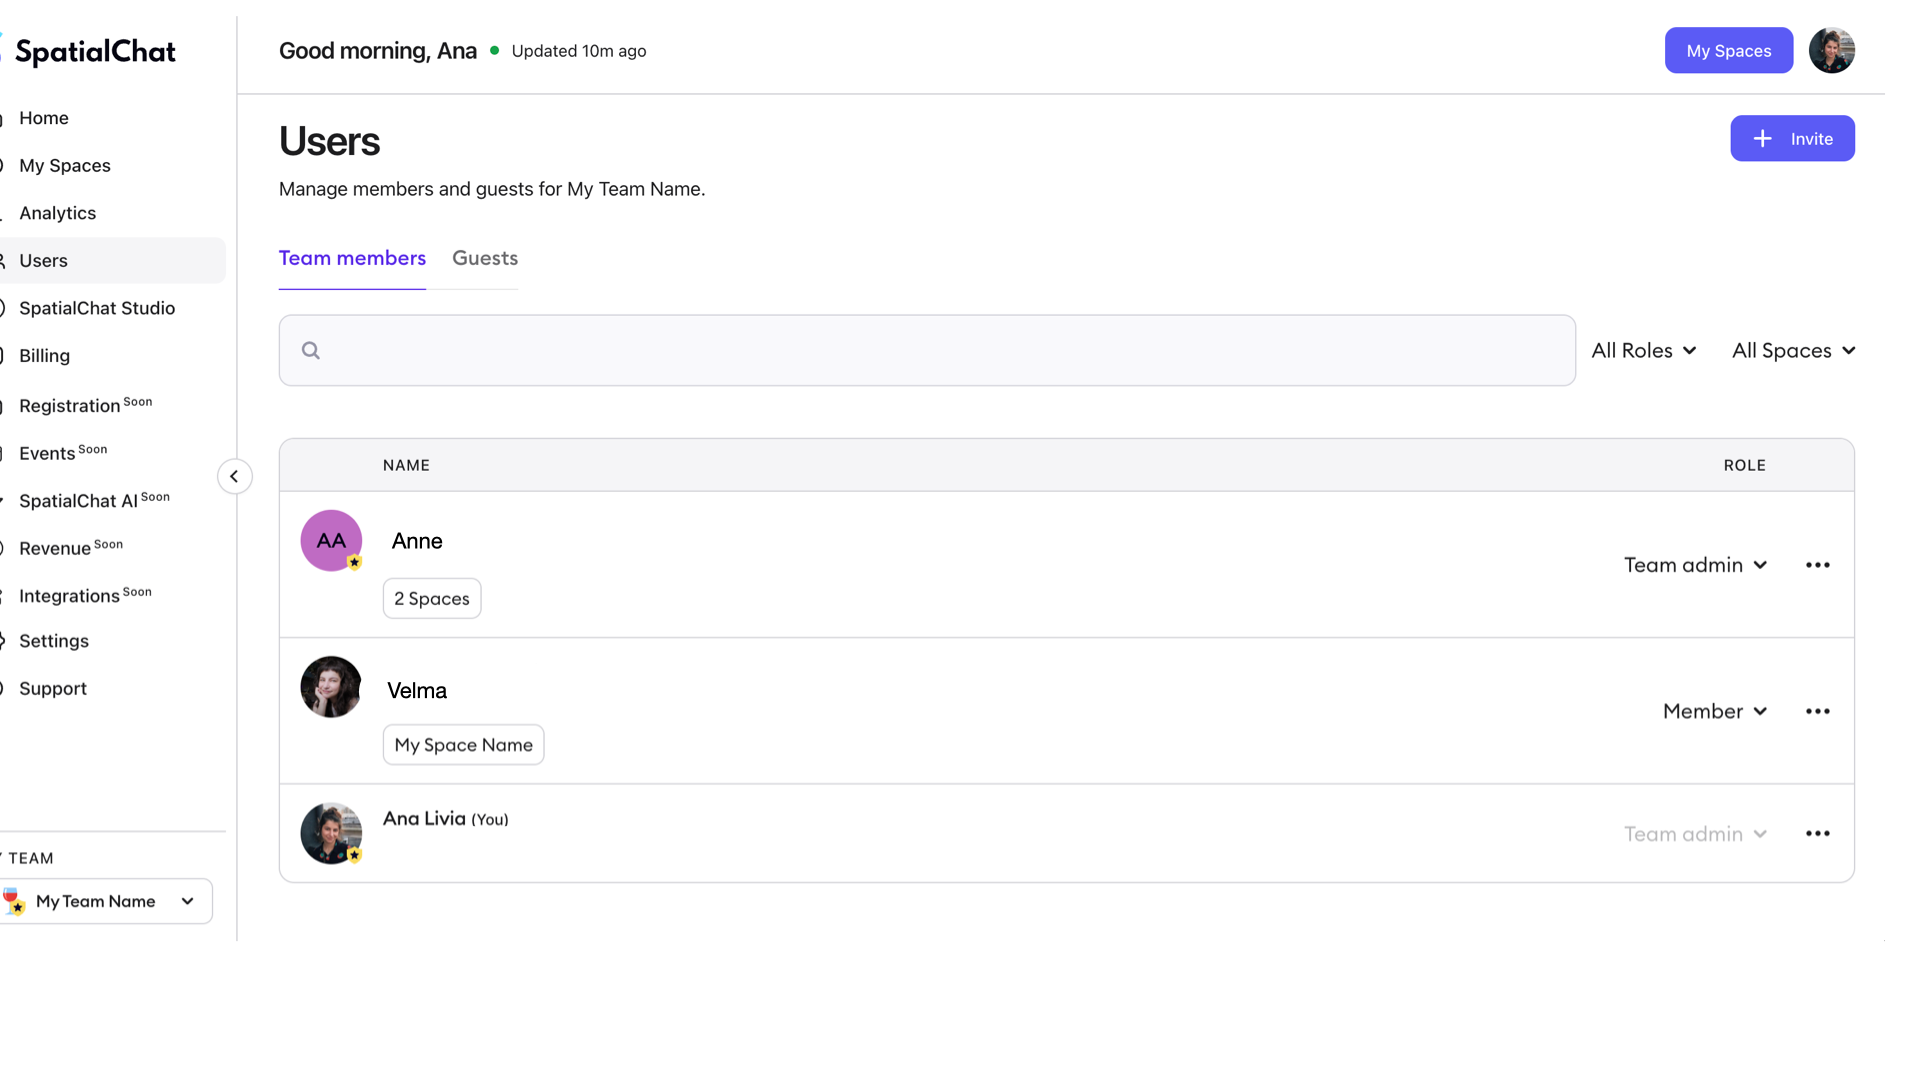
Open Users to review the people associated with your team. The page separates Team members and Guests, with a search field and filters for roles and spaces.
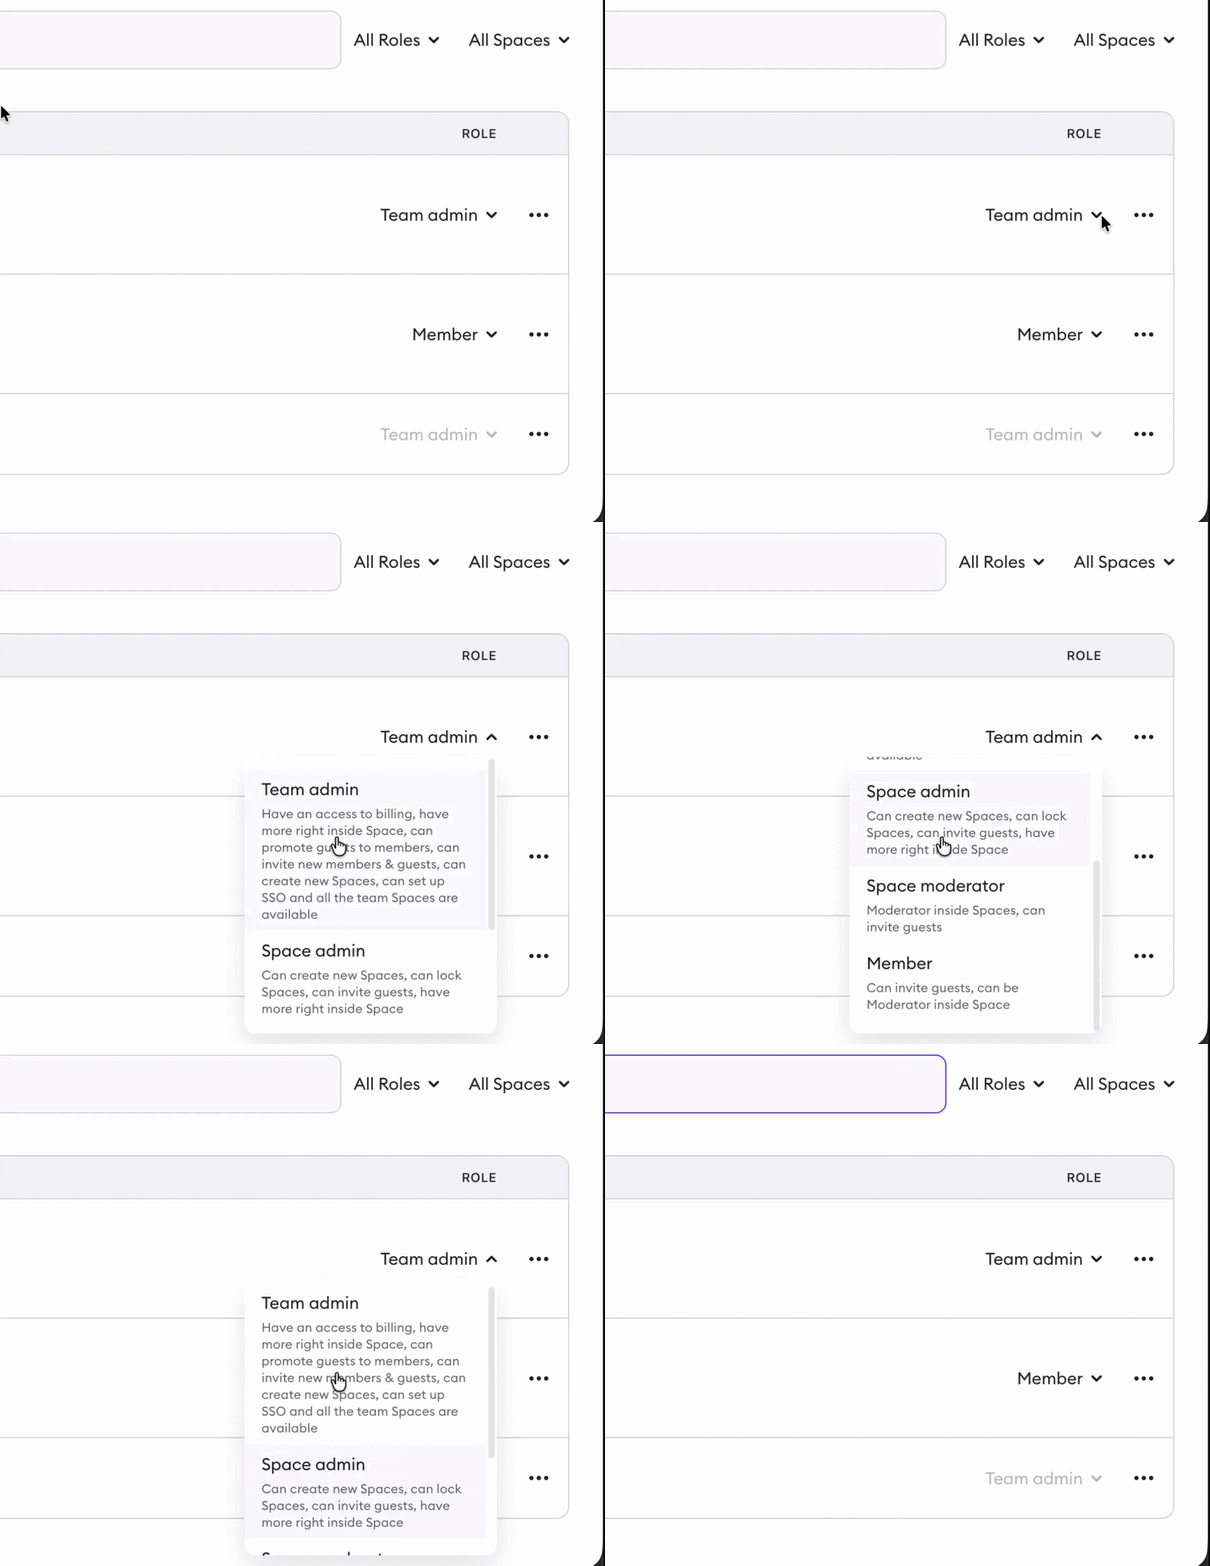
The role filter includes Team admin, Space admin, Space moderator, and Member. Use it to narrow the list when reviewing who has a particular role. The space filter helps you focus on the people associated with a specific space.
The member list shows names, roles, and space assignments where applicable. For someone associated with several spaces, a space-count control provides a useful indication of that scope.
Before an event, use this page to review the organizing team and confirm that the relevant people appear under the intended spaces.
Make Home useful for your routine
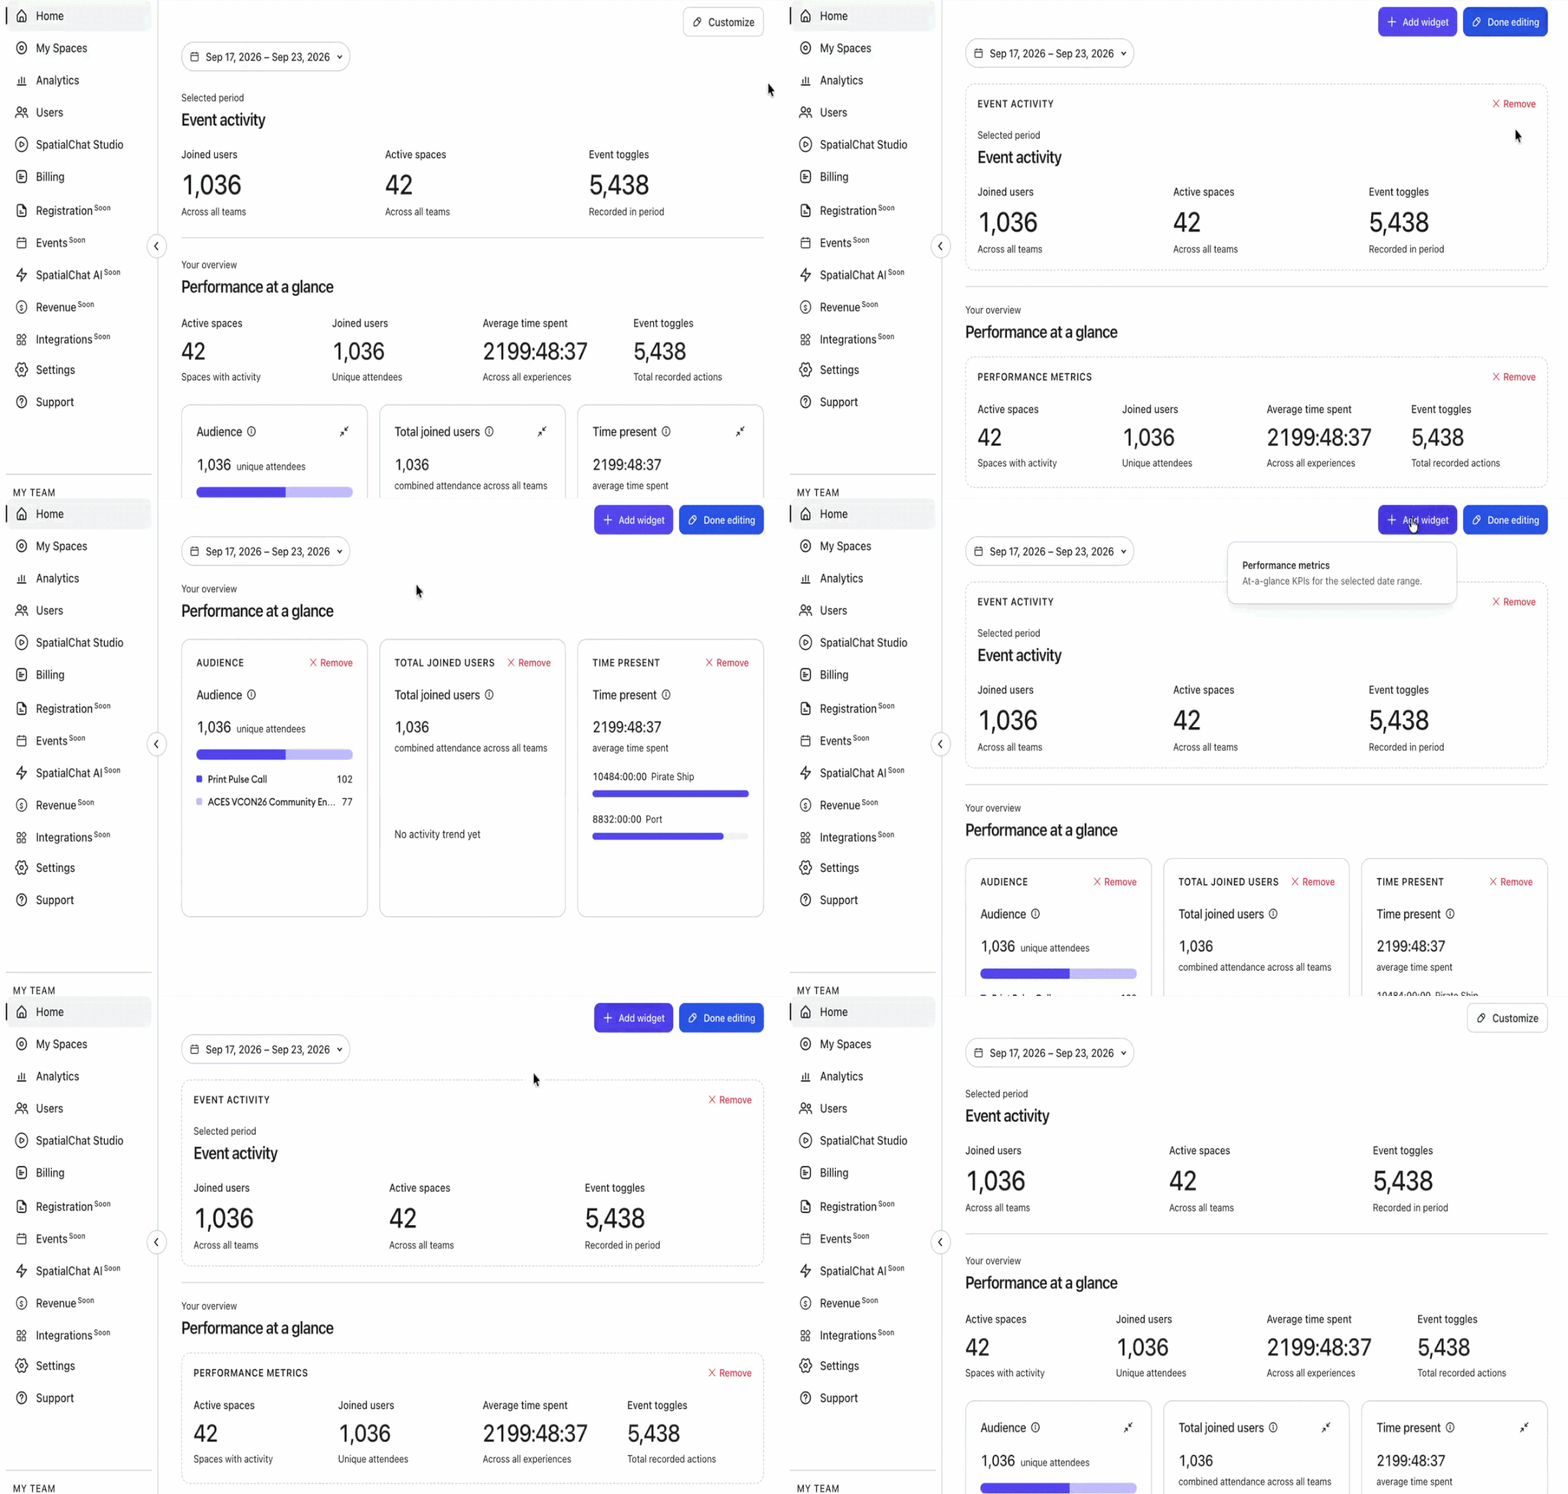
Home provides a quick activity overview, with a date selector and widgets covering attendance, active spaces, recorded actions, and time present.
Use the date selector to choose the period you want to review. Pay attention to the scope written beneath each metric: some Home cards are labeled Across all teams. For a view focused on the selected team, open Analytics.
You can also adjust which widgets appear on Home. Select Customize to enter editing mode. Widgets display a Remove control, while Add widget provides access to widgets that are not currently displayed. Select Done editing when you finish.
This lets you keep your most useful information close at hand—for example, prioritizing attendance when reviewing a recurring event.
Understand activity with Analytics
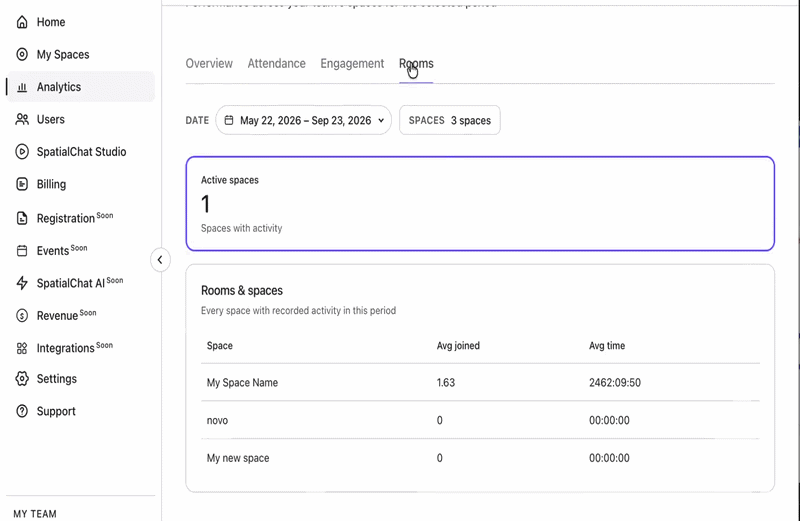
Analytics focuses on your team’s spaces for the selected period. It separates information into four views: Overview, Attendance, Engagement, and Rooms.
Start by setting your dates. The date panel includes From and To fields, a Last 7 days shortcut, and an Apply button. For a workshop, select the day it took place. For a recurring activity, choose a consistent reporting period so your reviews are easier to compare.
Overview
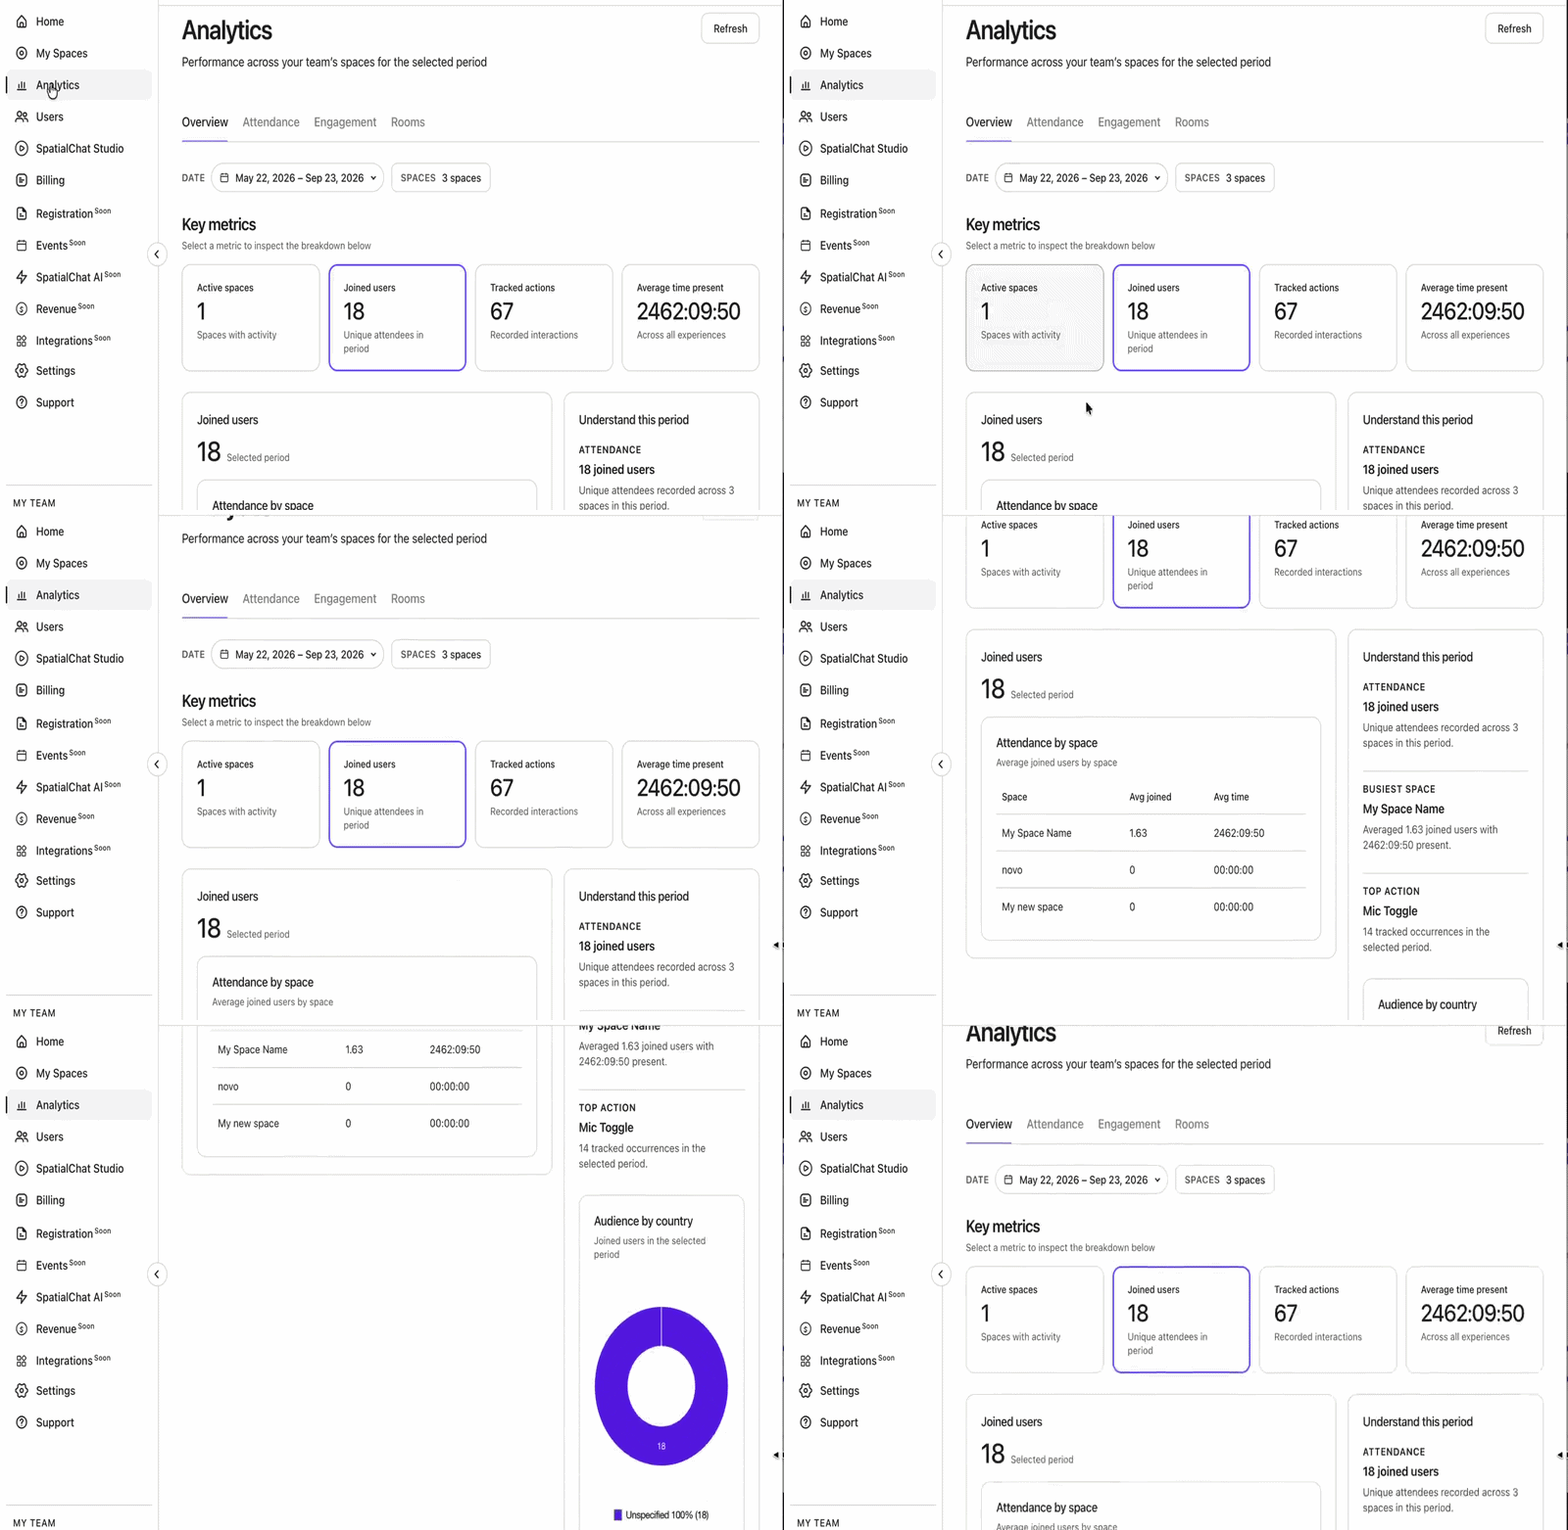
The Overview tab brings together four key metrics:
- Active spaces: spaces with recorded activity.
- Joined users: unique attendees recorded in the period.
- Tracked actions: recorded interactions.
- Average time present: the duration metric displayed by the dashboard.
Select a metric to inspect the breakdown below it. The page also includes contextual summaries such as the busiest space and the most frequently recorded action, along with an audience-by-country section.
Attendance
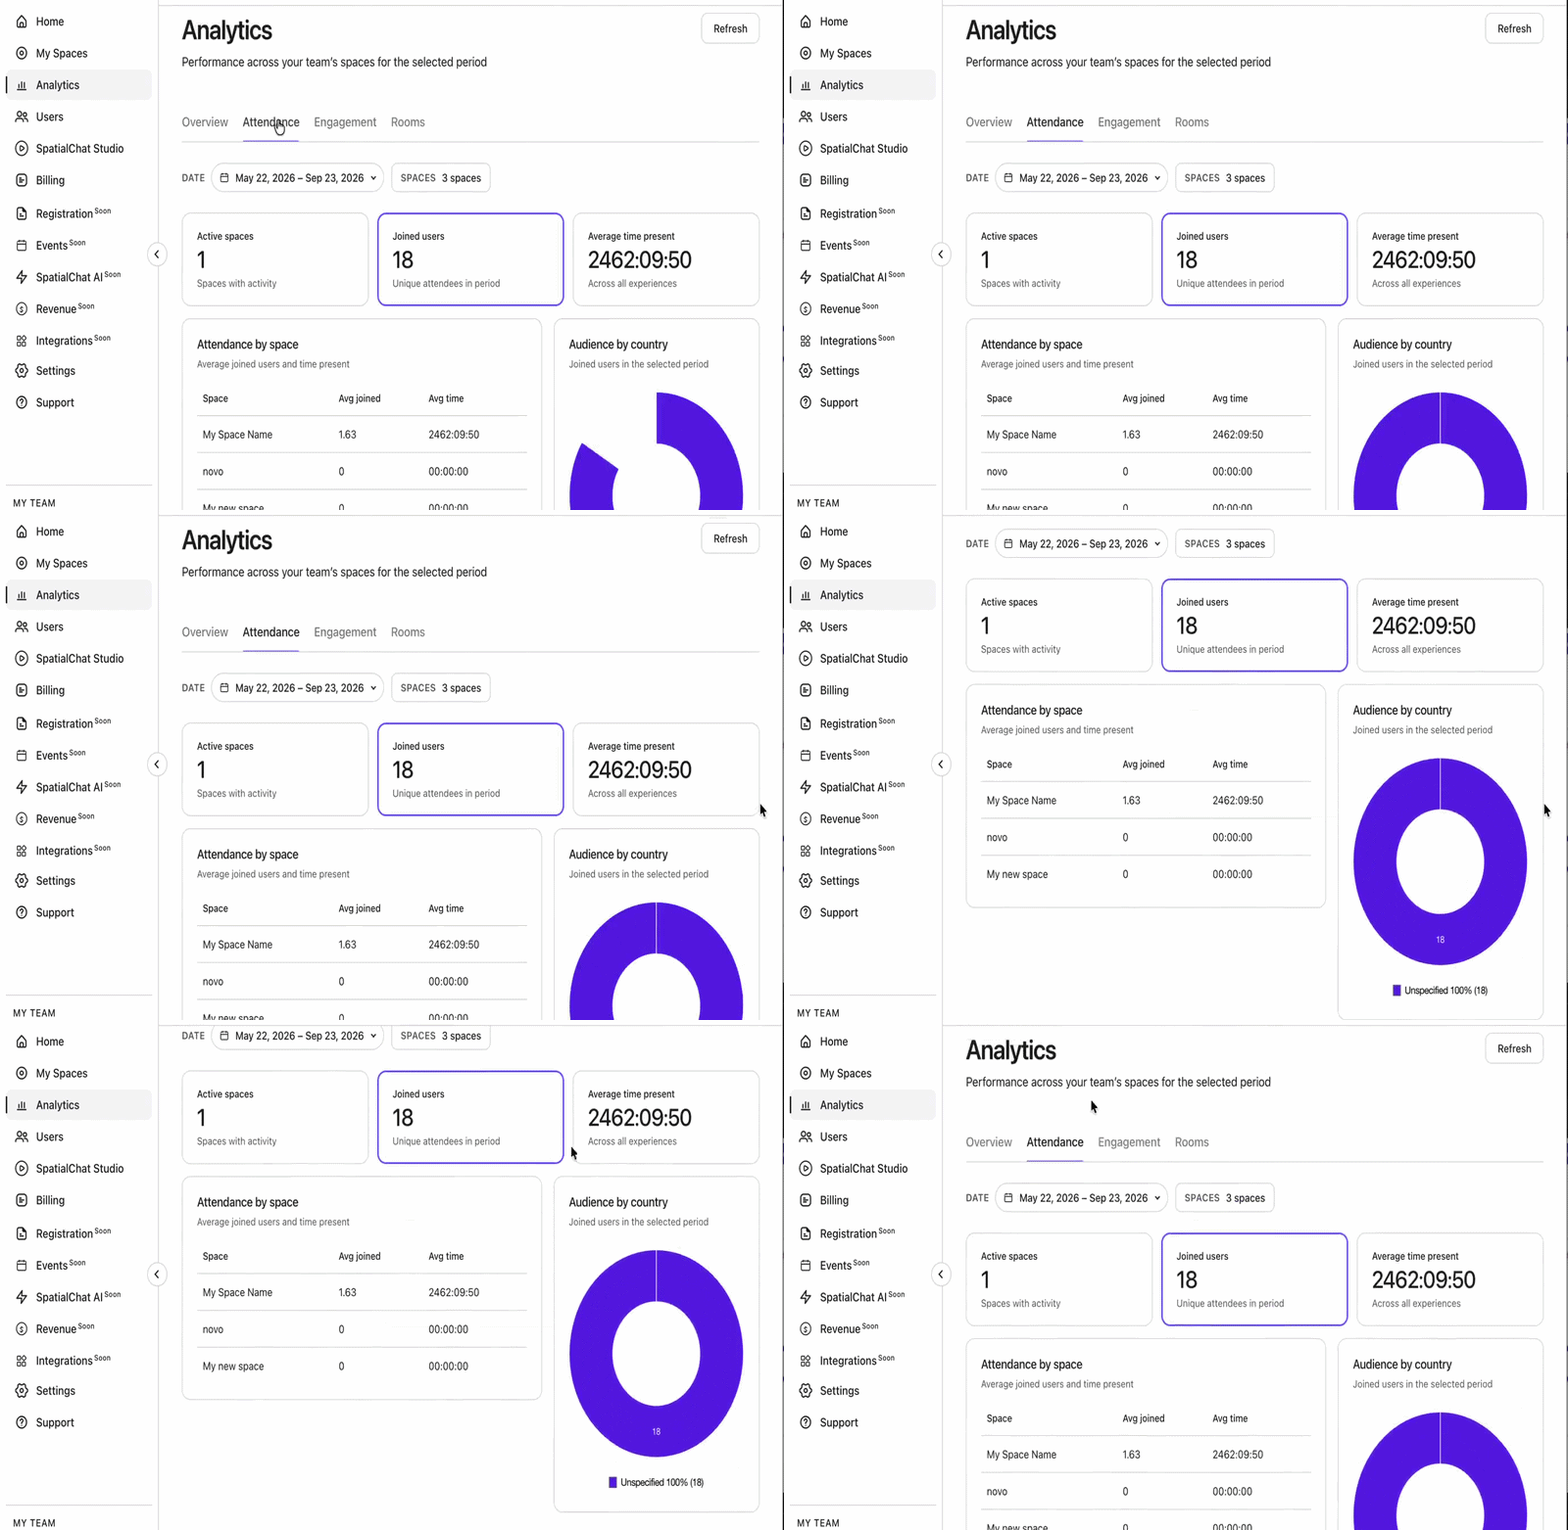
Attendance brings together attendance and time-present information, with a table organized by space. Columns include Avg joined and Avg time.
Keep the distinction between totals and averages in mind. The Joined users card and the Avg joined column describe different measures and should not be treated as interchangeable.
This view is useful when reviewing which spaces people used during a period. It also includes the Audience by country section for geographic context when data is available.
Engagement
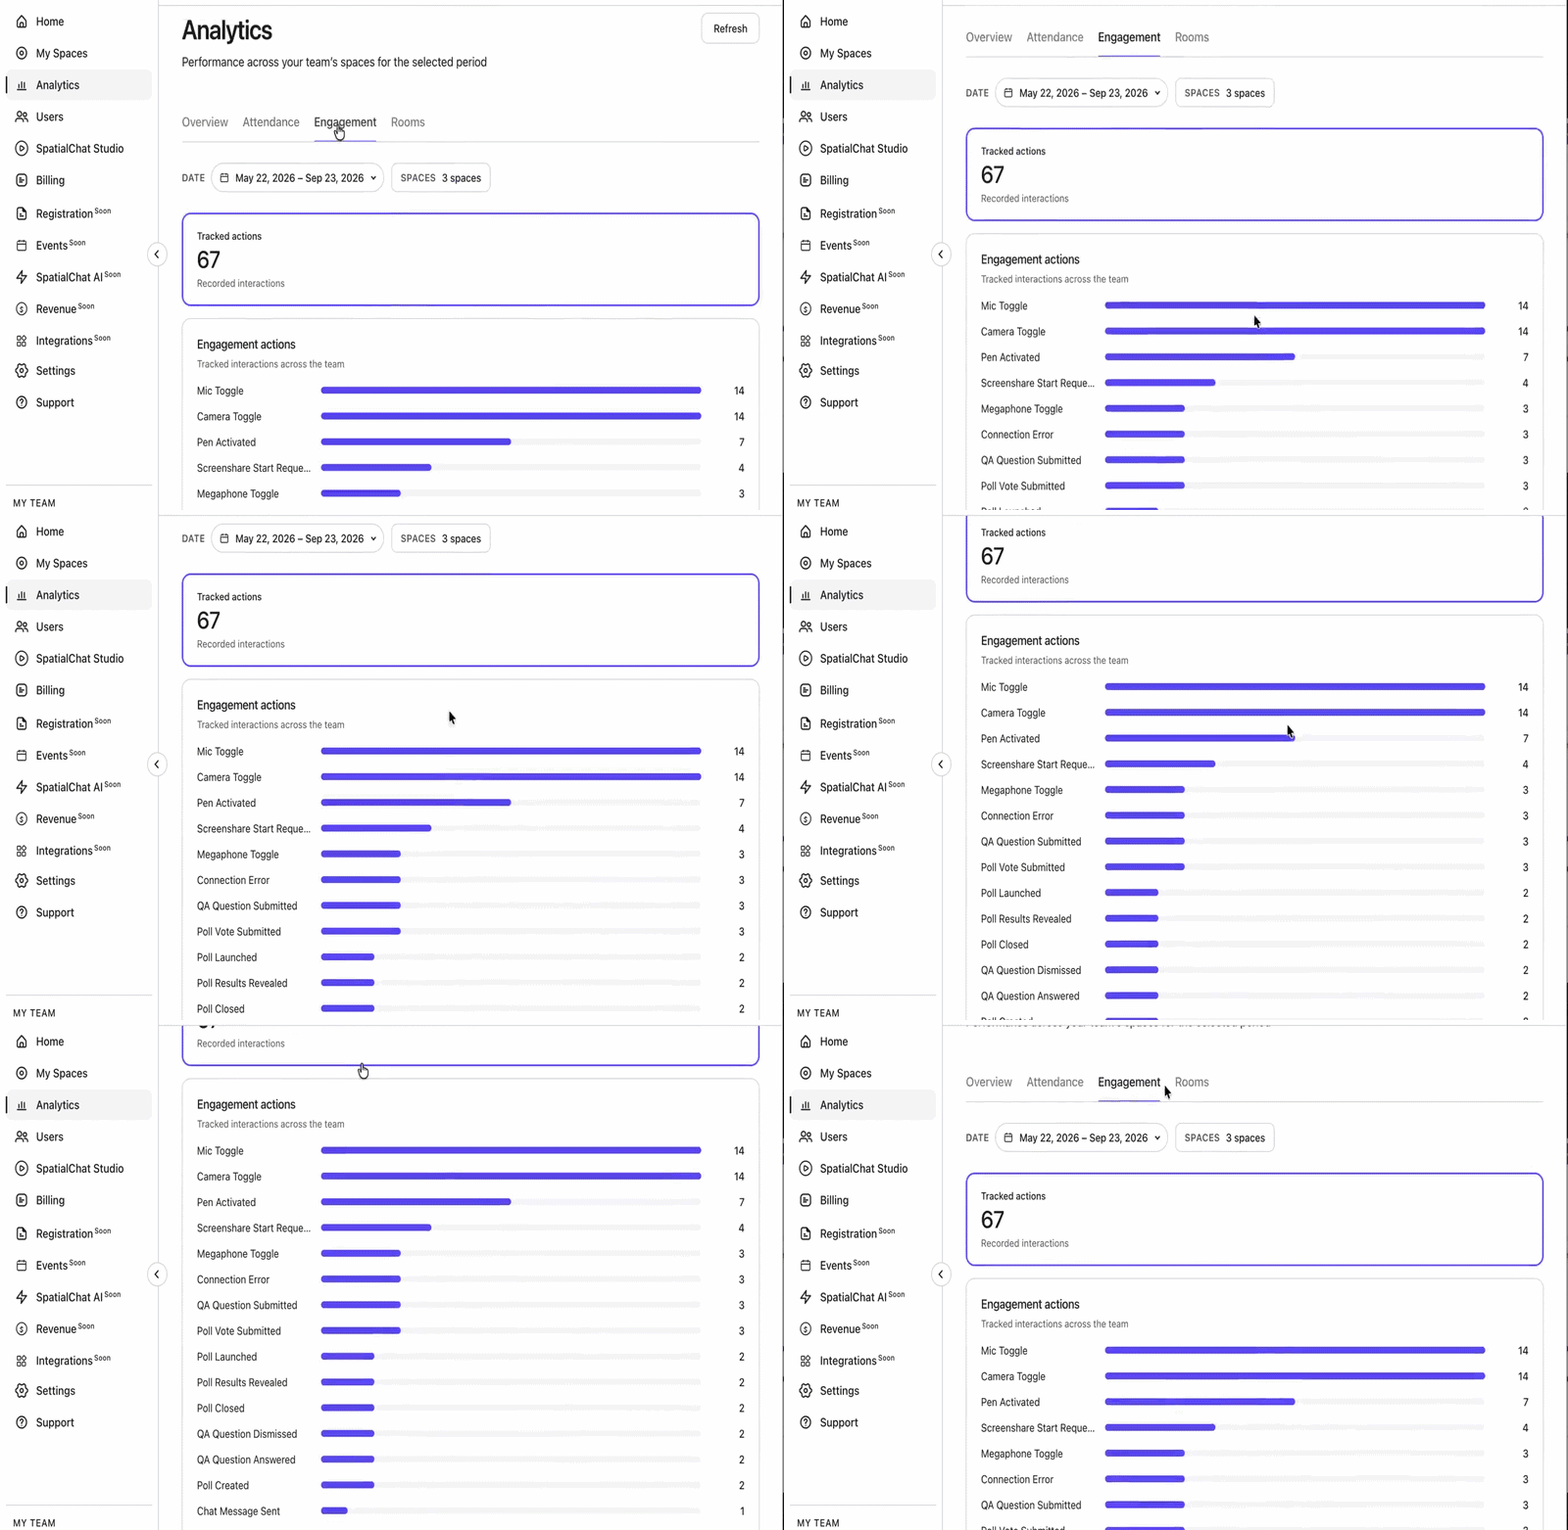
Engagement shows the types of interactions recorded across the team.
Examples visible in this team include Pen Activated, Screenshare Start Requested, Mic Toggle, Camera Toggle, Megaphone Toggle, Chat Message Sent, and Element Shared.
These labels help you understand which tools participants interacted with. For a brainstorming session, you might review pen activations, shared elements, and chat messages alongside your own observations of the session.
A screen-sharing request is not necessarily a completed screen share, and an action count is not a count of distinct people. These figures describe tool activity; they do not measure the quality of an idea or conversation.
Rooms
The Rooms tab provides a Rooms & spaces table with space names, average joined users, and average time.
Use it to review activity by space within the selected period. A space with zero activity may simply fall outside your event schedule, so check the date range before drawing conclusions.
Find past sessions in SpatialChat Studio
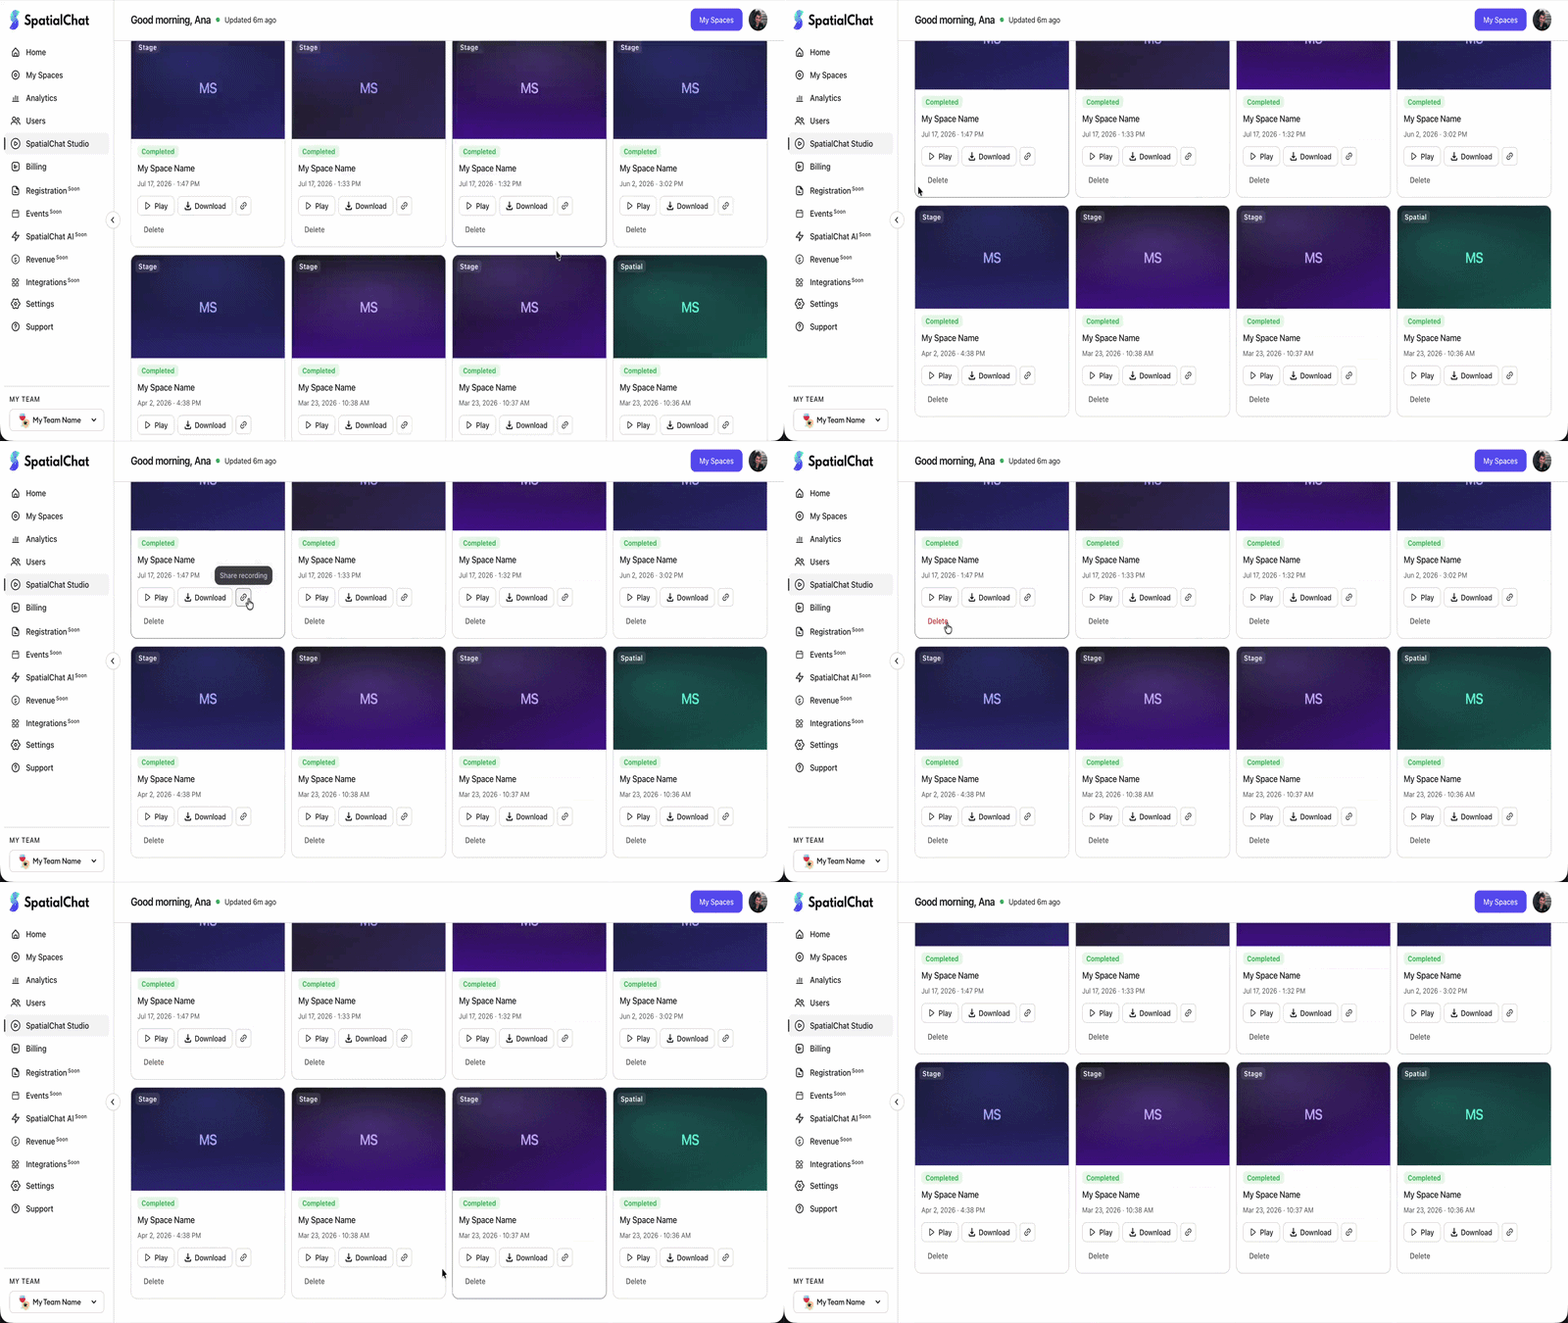
SpatialChat Studio brings recordings and transcripts into a dedicated area, with separate tabs and a date filter.
In Recordings, each available item identifies the space, recording date and time, recording type—such as Stage or Spatial—and processing status. Completed recordings display Play and Download controls.
Use Play to review a session and Download when you need a local copy. Recording cards also include a Delete control, so take care to distinguish playback and download actions from removal.
If the page says No recordings in this date range, try a wider period. An empty result for the current week does not mean the team has no recordings. You can also use Refresh to retrieve the latest available items.
The Transcripts tab provides a separate place to check for available transcripts.
Configure the experience in Settings
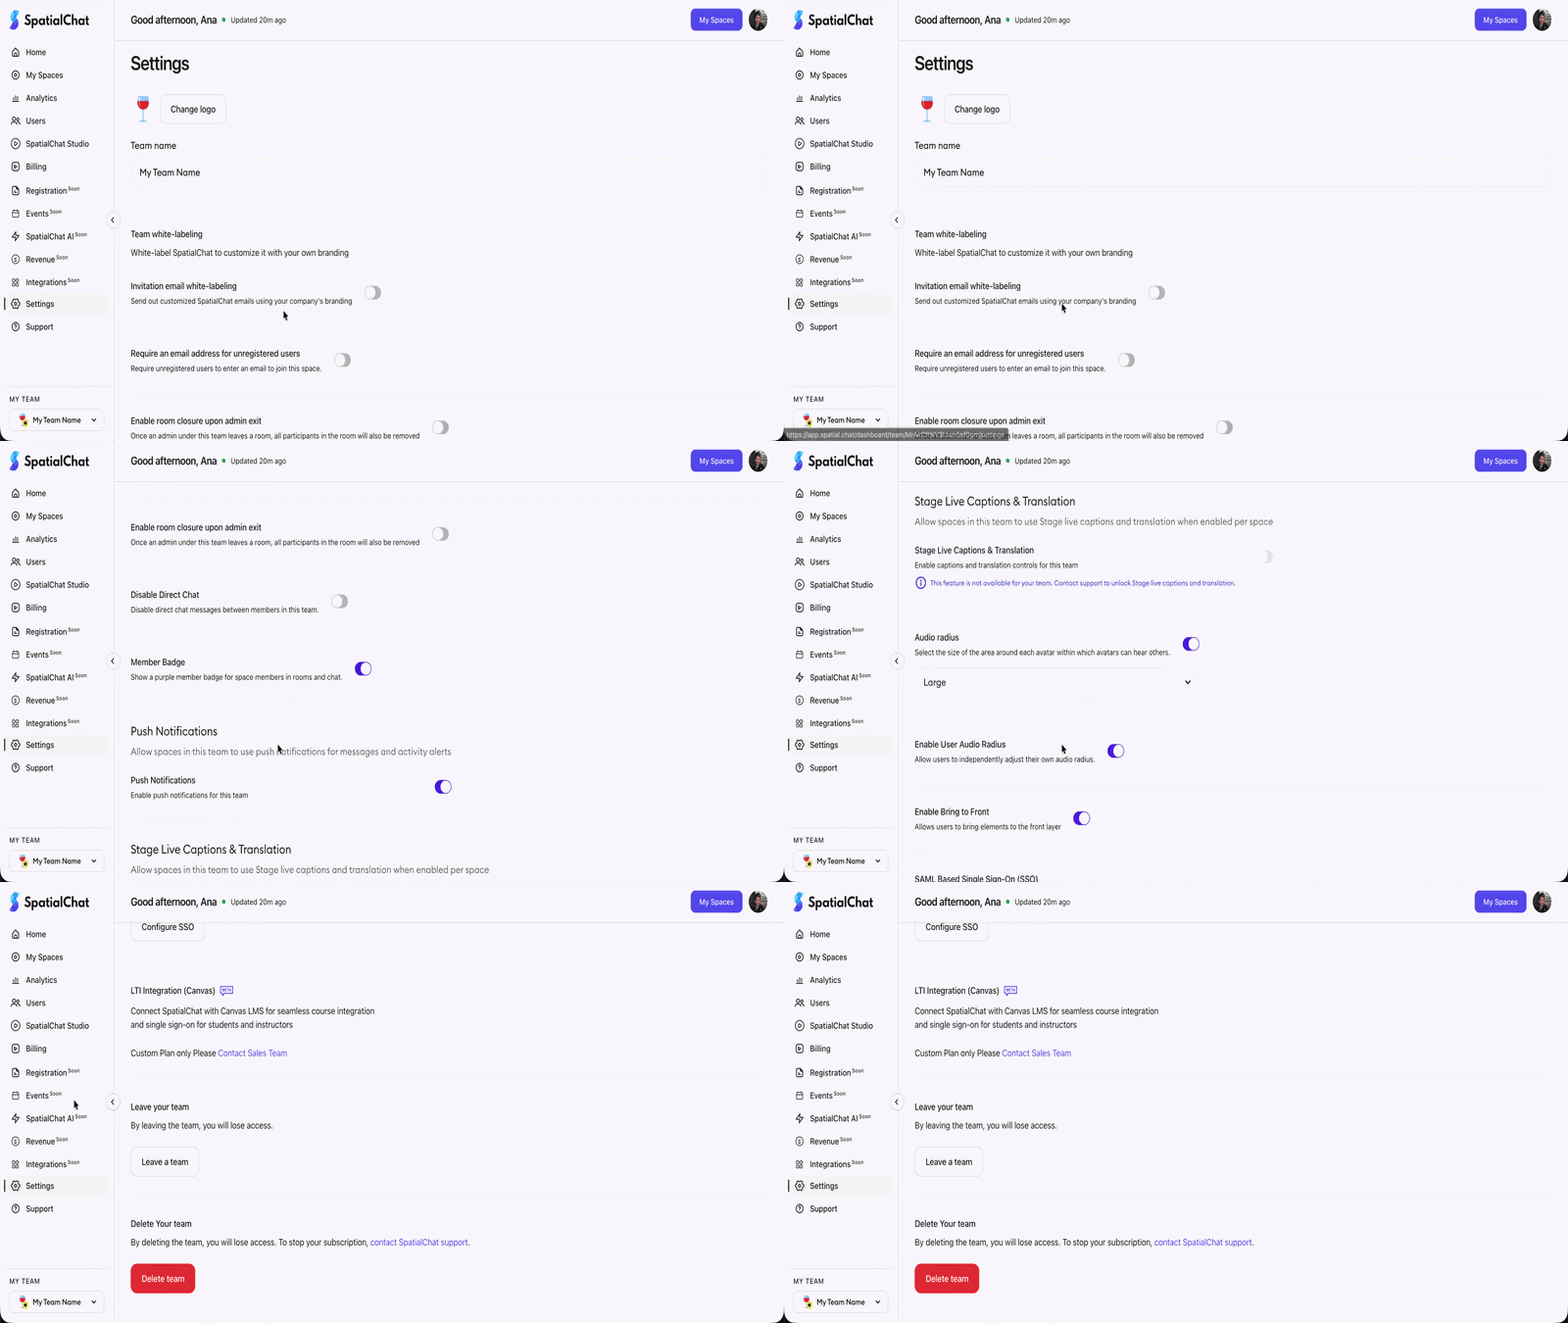
Settings contains team identity, branding, and participant-experience controls. Review these before a session so the experience matches how you intend to host it.
Team identity and branding
The page includes controls for your team’s name and logo, as well as team white-labeling and invitation-email white-labeling options.
These are the areas to review when preparing a branded environment or aligning invitation emails with your organization’s identity.
Participation and communication
Several settings affect how people participate:
- Require an email address for unregistered users adds an email requirement for those joining without registration.
- Enable room closure upon admin exit removes participants from a room when an admin under the team leaves it.
- Disable Direct Chat controls direct messaging between team members.
- Member Badge displays a purple badge for space members in rooms and chat.
- Push Notifications controls whether the team’s spaces can use notifications for messages and activity alerts.
The room-closure setting deserves particular attention when planning a hosted session: consider whether participants should remain in the room after the admin leaves.
Spatial audio and shared content
Audio radius sets the area around an avatar within which people can hear others. Enable User Audio Radius allows users to adjust their own radius independently.
These controls are relevant when planning a space with several conversations happening at once.
Enable Bring to Front allows users to bring elements to the front layer, which can help when working with overlapping content.
Features that depend on availability
Some settings depend on your team’s access or plan. The page may provide a configuration button, an availability message, or instructions to contact support or sales.
Examples include Stage Live Captions & Translation, SAML Based Single Sign-On, and LTI Integration with Canvas. Check the message shown for your team before including one of these features in an event plan.
Check your plan in Billing
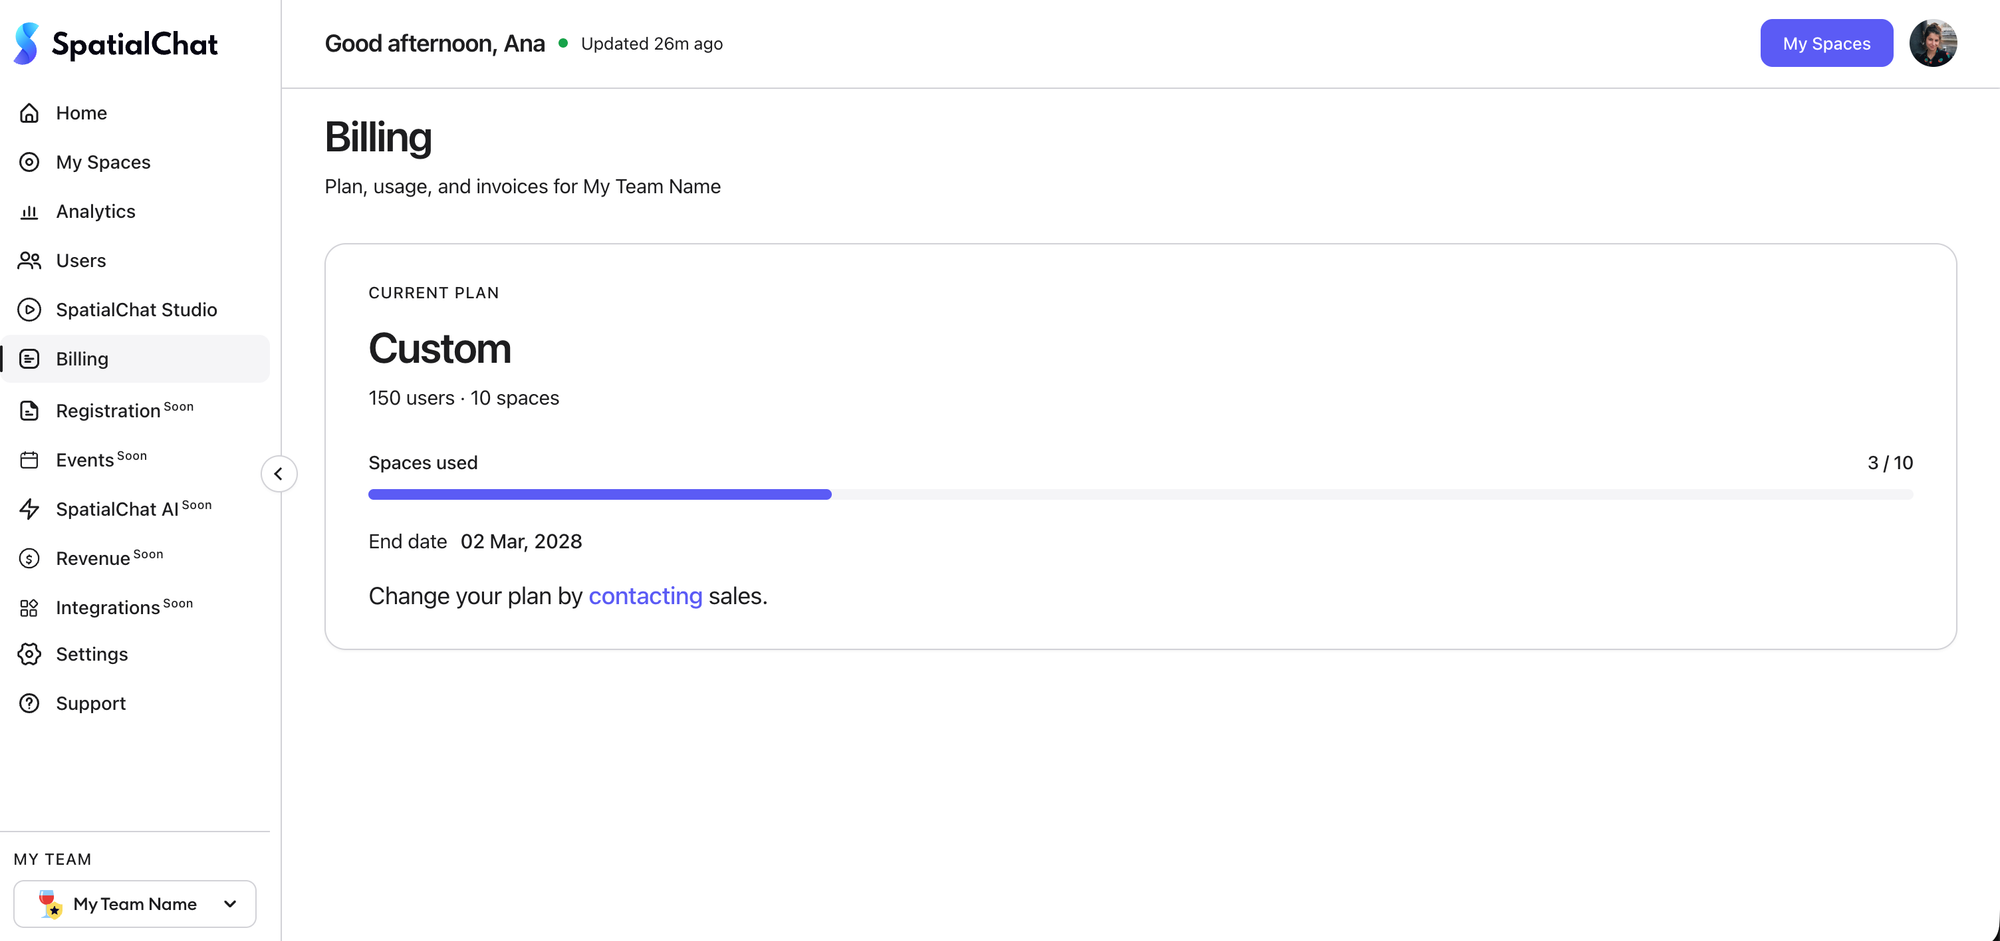
Billing shows the team’s current plan and relevant usage information, including user capacity, space allowance, spaces used, and the plan’s end date where applicable.
Check this section before expanding to additional spaces or planning a larger gathering. For the Custom plan reviewed here, the page directs the team to contact sales to change the plan.