How to Configure SAML-Based Single Sign-On (SSO) in SpatialChat
SpatialChat supports SAML-based Single Sign-On (SSO) for enterprise customers who want users to access the platform through a single authentication source.
SSO configuration is available for teams on a Custom Plan. If you do not see the SSO settings in your account, please contact the SpatialChat Sales or Support team.
Before you begin
To configure SSO, you will need access to your SpatialChat team settings and the SAML configuration details from your Identity Provider.
You may need the following information from your Identity Provider:
- IdP Sign-In URL
- Identity Provider Entity ID
- Identity Provider Certificate
You will also need to provide SpatialChat Service Provider details to your Identity Provider.
Step 1: Open your team settings
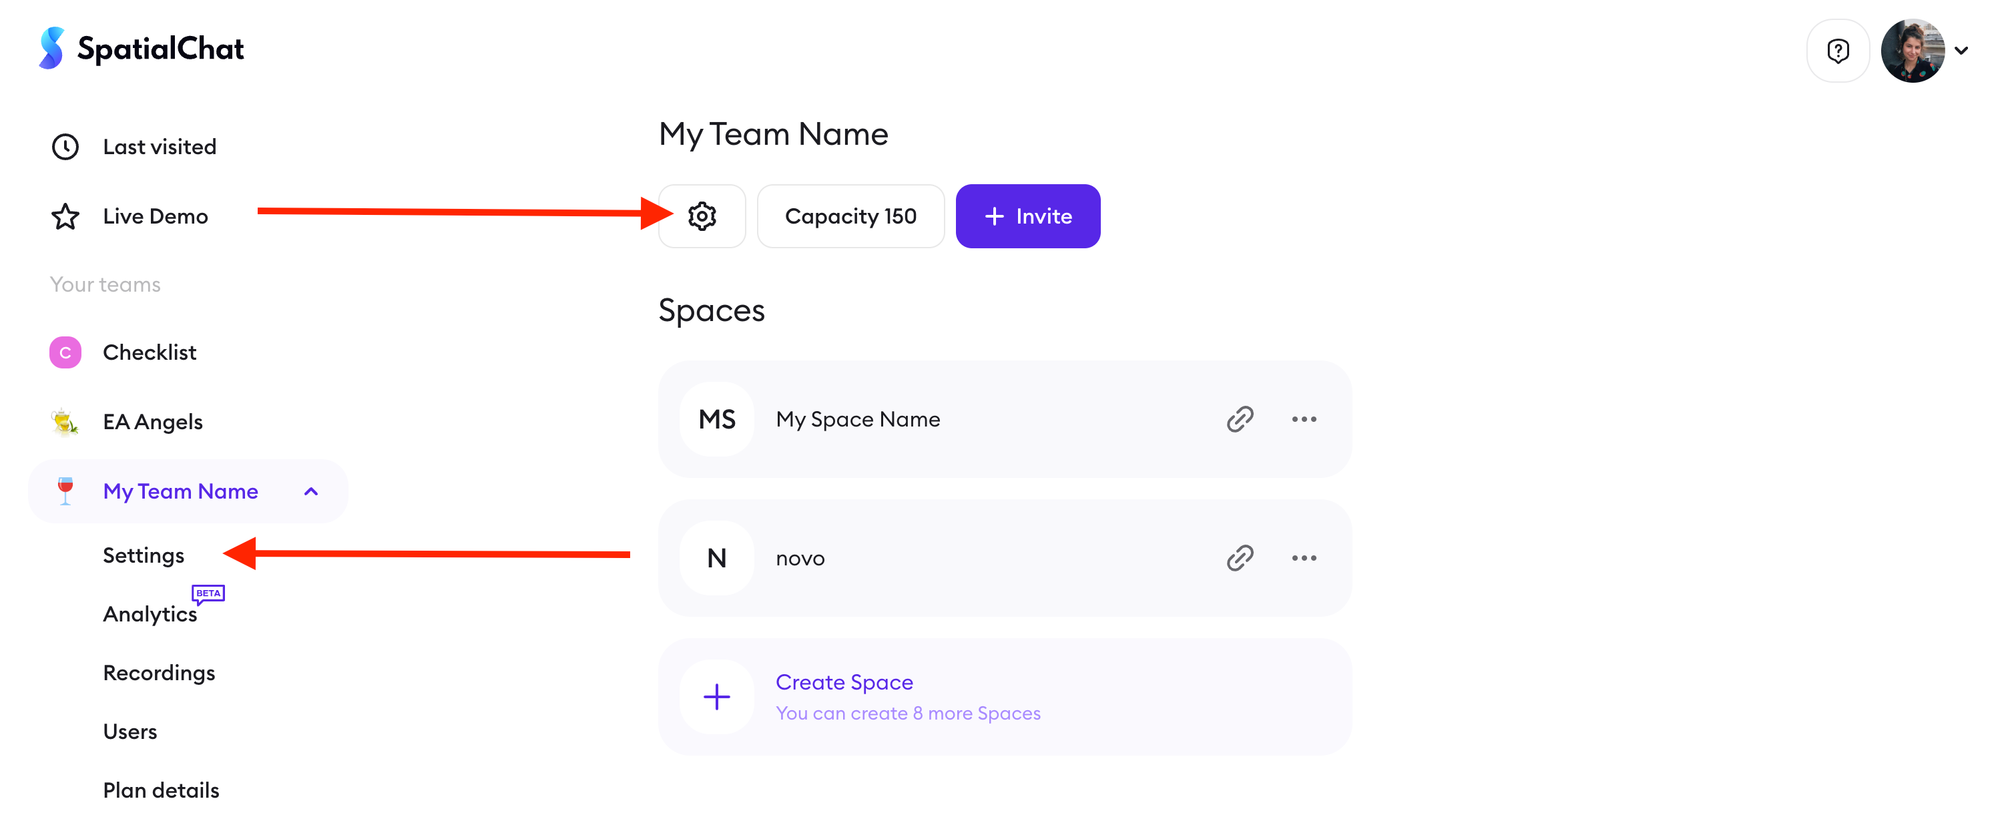
From your SpatialChat dashboard, select the team where you want to configure SSO.
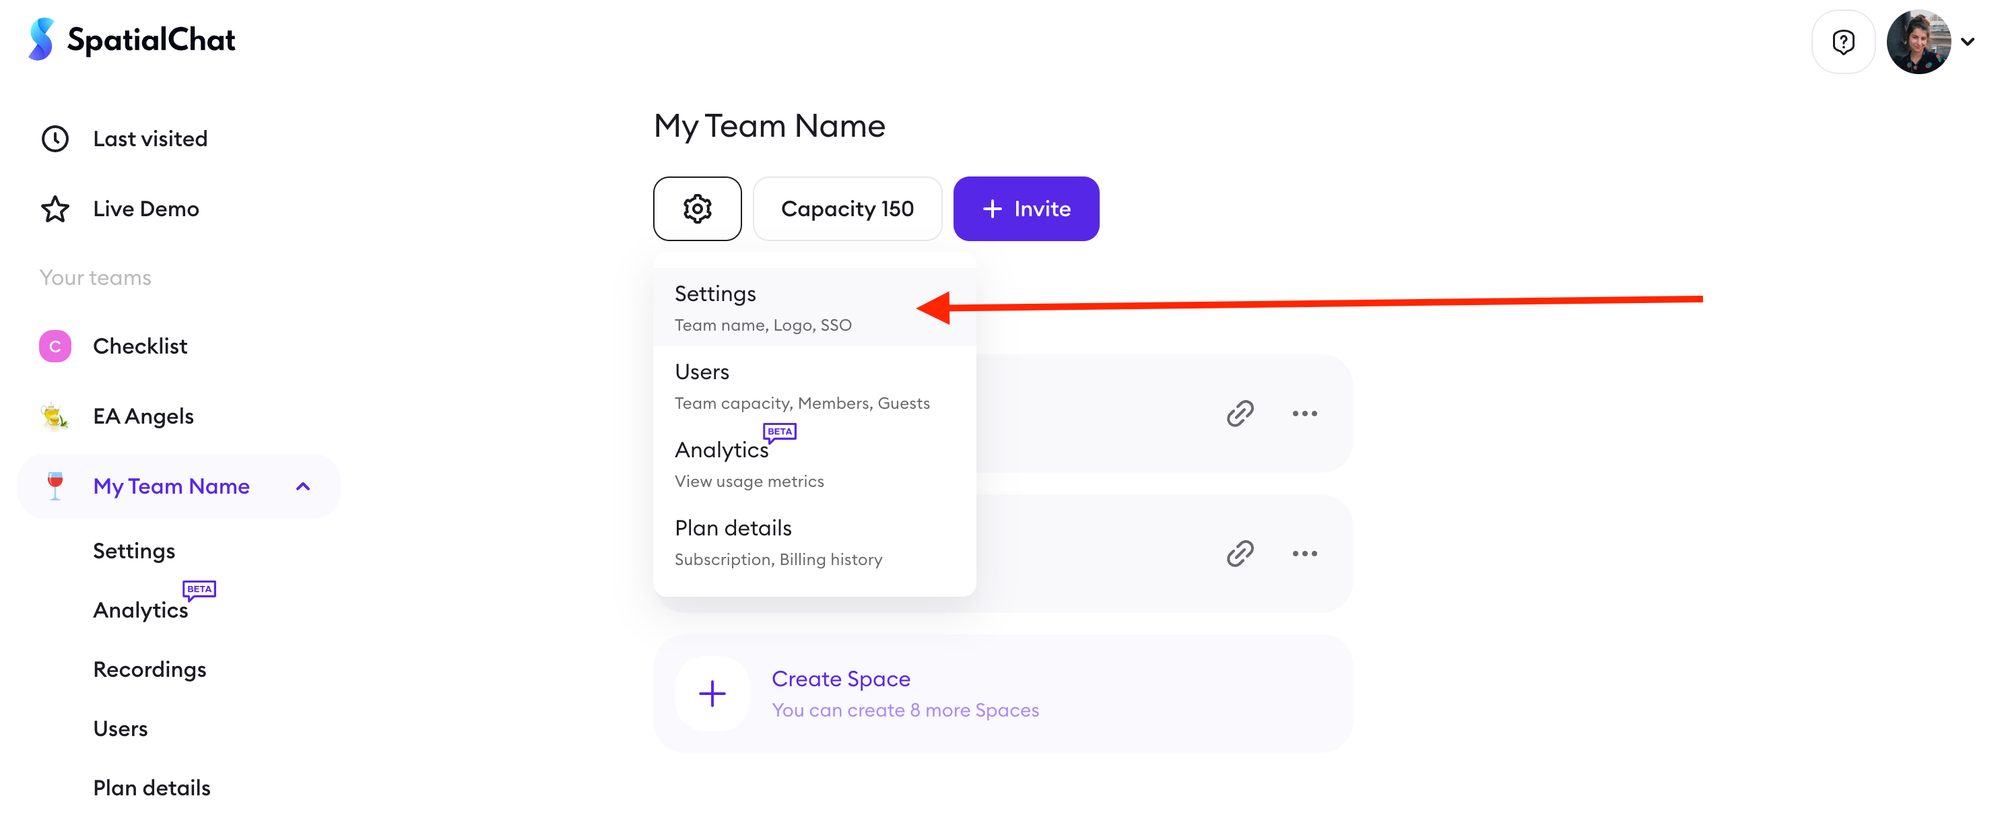
In the left sidebar, open your team menu and go to Settings. You can also access team settings from the gear icon near your team name.
Step 2: Find the SAML SSO section
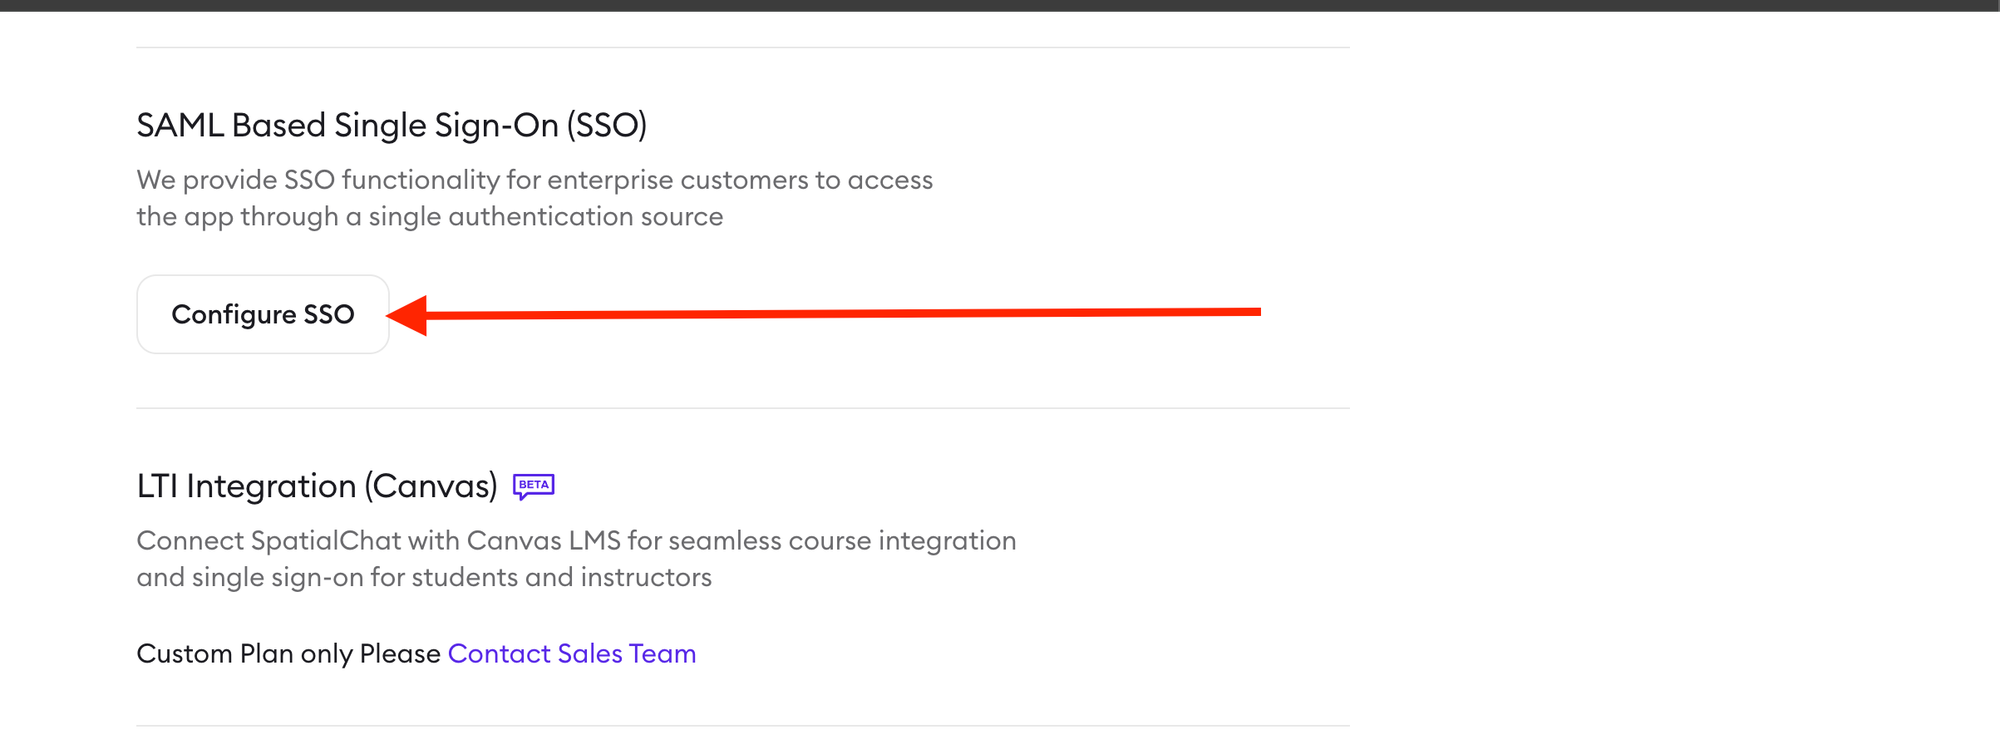
Inside Team Settings, scroll down to locate the section called SAML Based Single Sign-On (SSO).
This section is used to configure SSO access for your SpatialChat team.
Click Configure SSO.
Step 3: Add your Identity Provider details
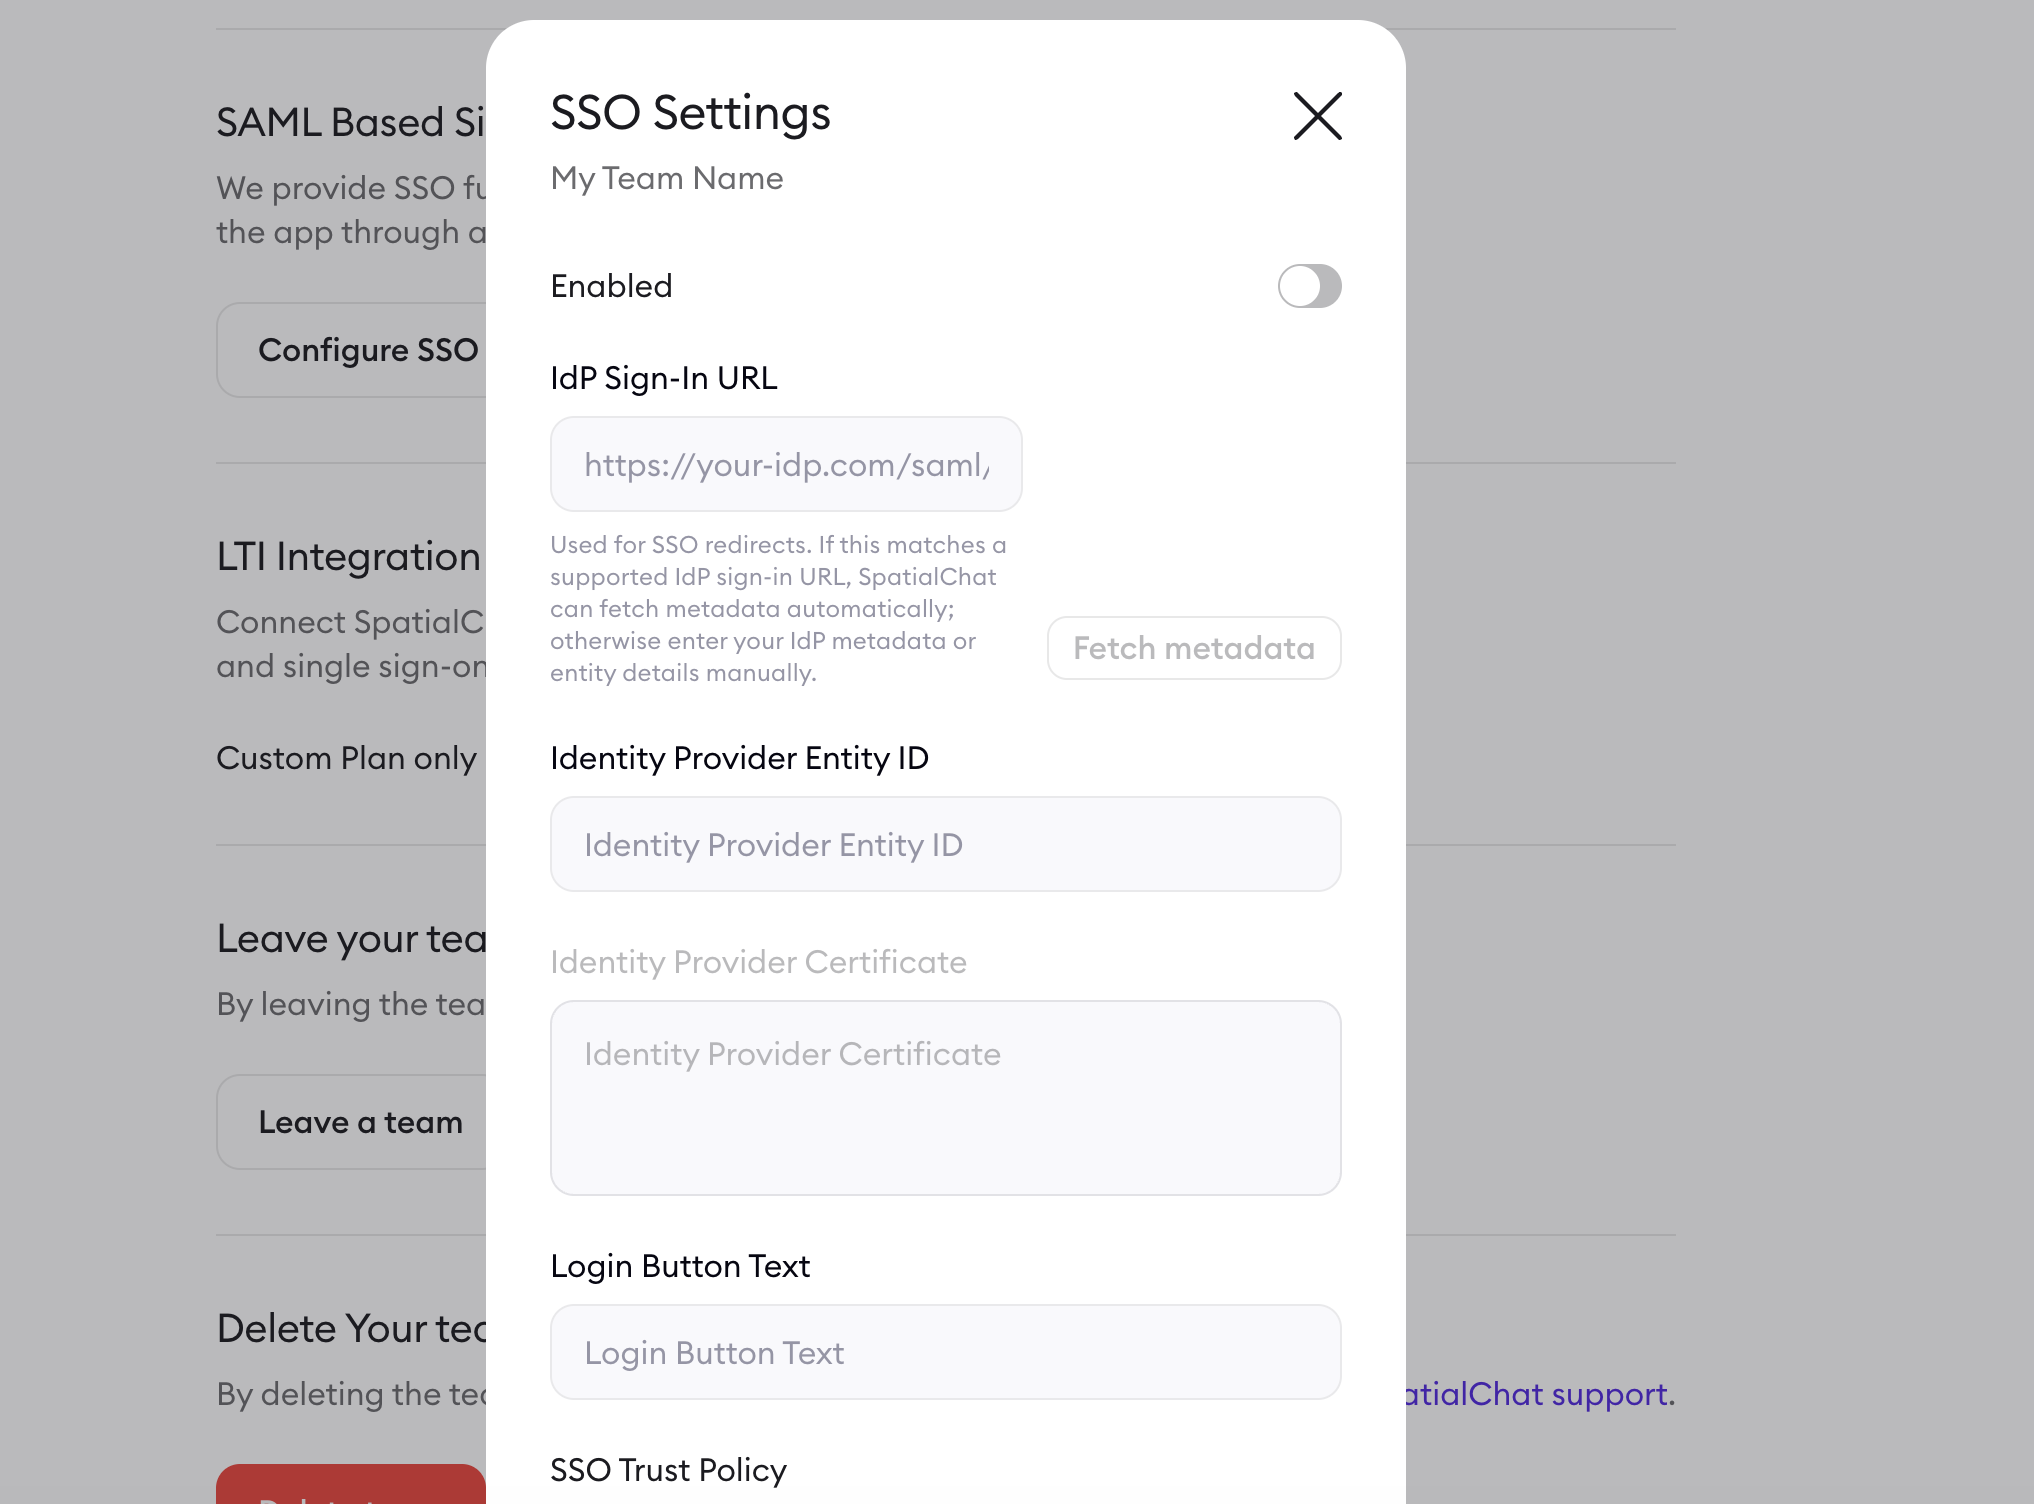
The SSO Settings window will open.
Fill in the required Identity Provider information:
- IdP Sign-In URL: the sign-in URL provided by your Identity Provider.
- Identity Provider Entity ID: the entity ID from your Identity Provider.
- Identity Provider Certificate: the certificate provided by your Identity Provider.
If your IdP Sign-In URL supports metadata, SpatialChat may be able to fetch metadata automatically. Otherwise, enter the Identity Provider metadata or entity details manually.
Step 4: Customize the login button text
Use the Login Button Text field to define the text users will see when signing in through SSO.
For example, you may want to use your organization name or a clear label such as “Sign in with SSO.”
Step 5: Review the SSO Trust Policy
The available SSO Trust Policy shown in the settings is Email Domain Allowlist.
This uses the existing email-domain allowlist gate. Platform admins still manage the allowed SSO domains for the team.

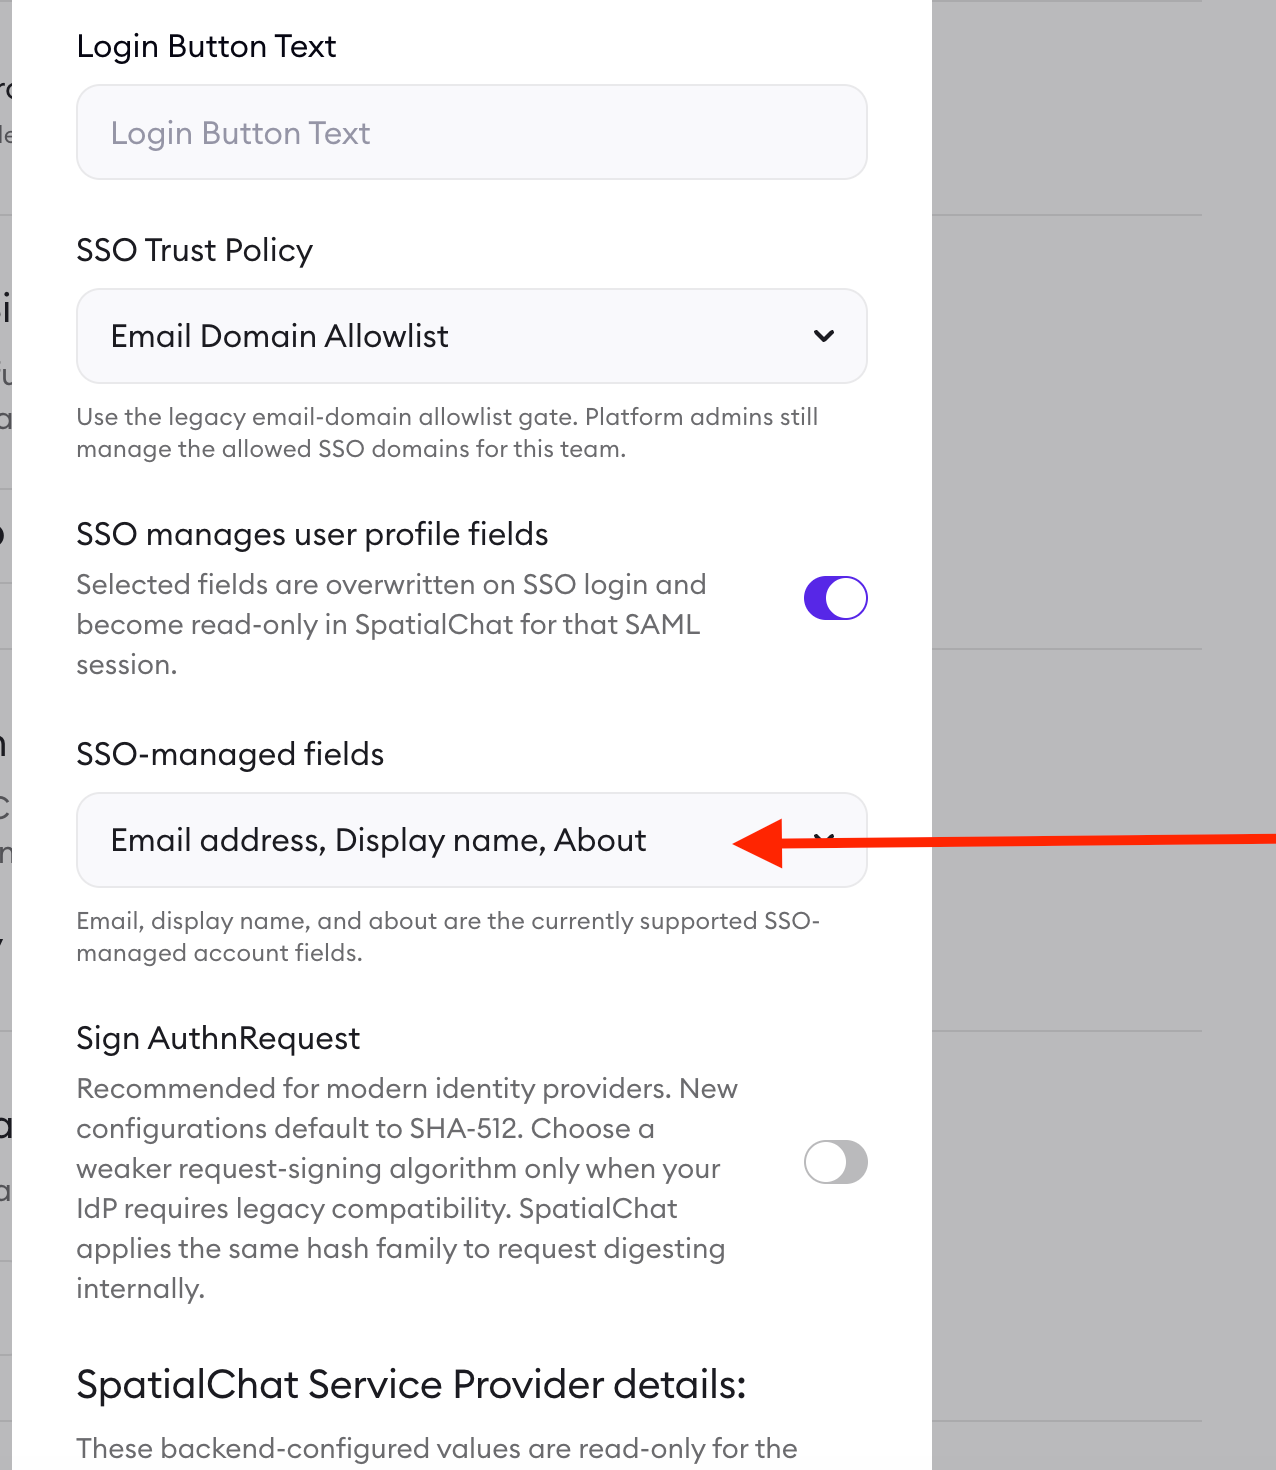
Step 6: Choose whether SSO manages user profile fields
SpatialChat allows SSO to manage selected user profile fields.
When enabled, selected fields are overwritten on SSO login and become read-only in SpatialChat for that SAML session.
The currently supported SSO-managed account fields are:
- Email address
- Display name
- About
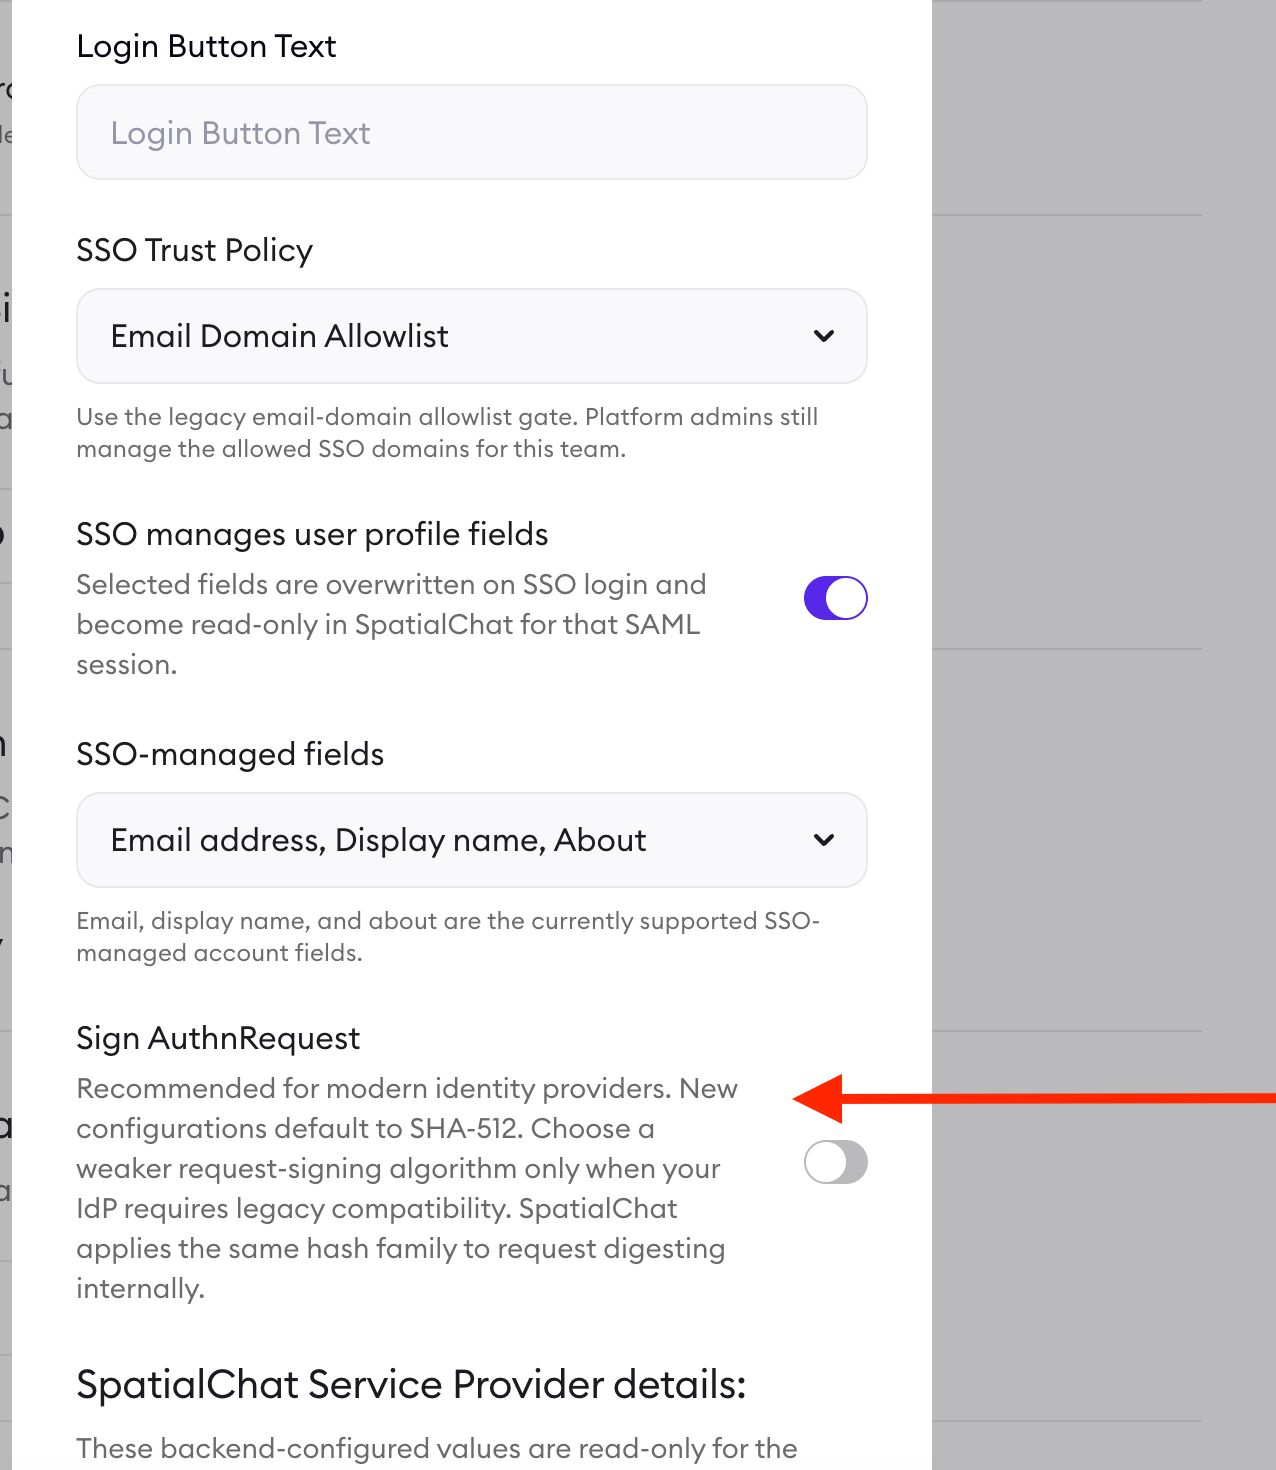
Step 7: Configure AuthnRequest signing
SpatialChat includes an option to Sign AuthnRequest.
This is recommended for modern Identity Providers. New configurations default to SHA-512. Choose a weaker request-signing algorithm only if your Identity Provider requires legacy compatibility.

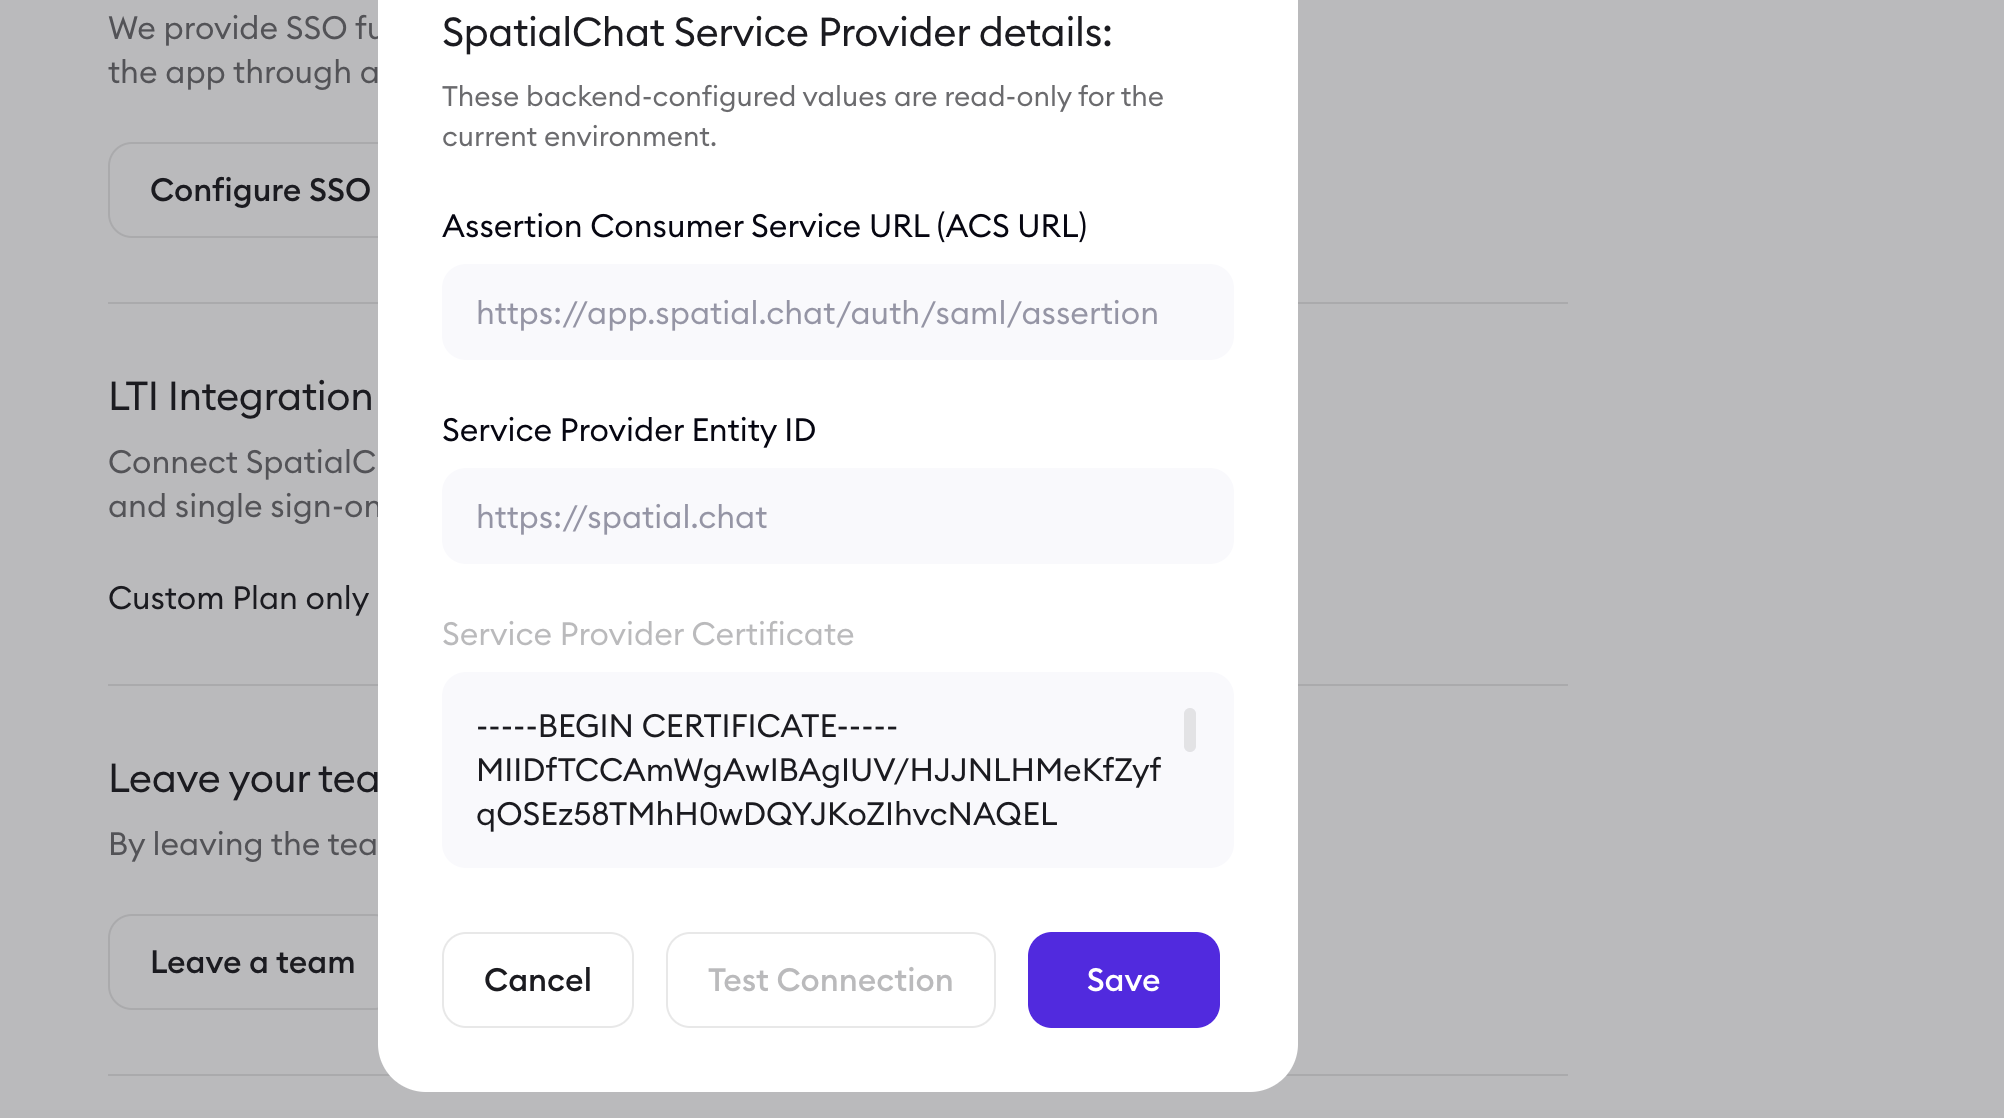
Step 8: Add SpatialChat Service Provider details to your Identity Provider
In the SSO Settings window, SpatialChat displays read-only Service Provider details for the current environment.
Use these values when configuring SpatialChat as a Service Provider in your Identity Provider:
- Assertion Consumer Service URL (ACS URL): https://app.spatial.chat/auth/saml/assertion
- Service Provider Entity ID: https://spatial.chat
- Service Provider Certificate: copy the certificate shown in your SpatialChat SSO settings.
These values are backend-configured and read-only.
Step 9: Save and validate the configuration
After entering the required Identity Provider details, click Save.
Once the configuration is saved, use Test Connection to validate the SSO setup. If the button is disabled, make sure the required fields have been completed first.
Because SSO depends on both SpatialChat and the Identity Provider configuration, you may also need to confirm that the correct SpatialChat Service Provider details were added to your IdP.

Troubleshooting
If users cannot sign in through SSO, review the configuration on both sides: SpatialChat and your Identity Provider.
Check that:
- The IdP Sign-In URL is correct.
- The Identity Provider Entity ID matches the value provided by your IdP.
- The Identity Provider Certificate was copied correctly.
- The ACS URL in your Identity Provider is set to https://app.spatial.chat/auth/saml/assertion.
- The Service Provider Entity ID is set to https://spatial.chat.
- The user’s email domain is allowed according to the SSO Trust Policy.
- If Sign AuthnRequest is enabled, your Identity Provider supports the signing configuration.
If the issue continues, contact SpatialChat Support with screenshots of your SSO settings and the error message shown during login.